
|
|
|||
|
DIY Surprise Party Invitations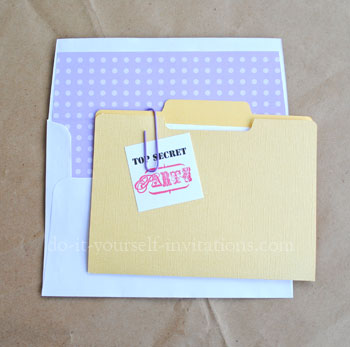 If you're looking for a clever way to make homemade surprise party invitations then you've found it! Create the DIY file folder "Top Secret" surprise party invites with my printable templates.
I created these using my Quickutz Silhouette die cutting machine, but I have included several kinds of templates to us in creating the little file folder invites. There's pretty much something for everyone, whether you're using the Silhouette, Sure Cuts A Lot and another machine, or even simply cutting these by hand. The finished invite creates a 5 by 7 folder with a 4.25 by 5.5" invitation insert. The invites will fit perfectly into a simple A7 envelope. I hope you enjoy creating them!
Make Your Own Surprise Party Invitations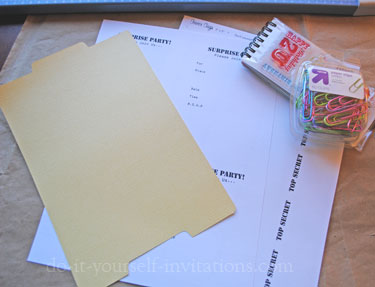
Materials and Supplies:
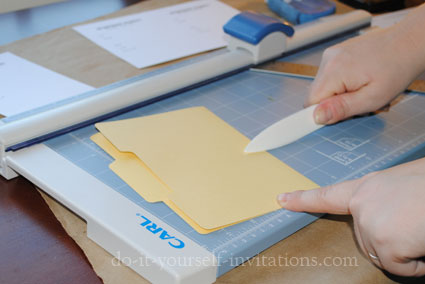
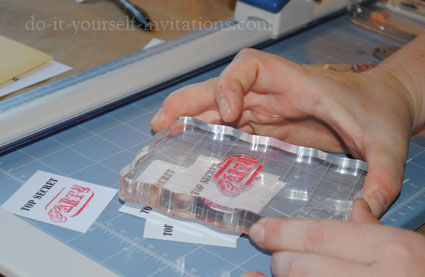
I created the file folders using my personal die cutting machine, but you could just as easily print the pdf template and use it to cut them by hand. For a super clean looking cut use a paper trimmer and corner rounding punch.
Surprise party invitation templates:
To score with a bone folder (or any other scoring tool you may have on hand) hold a ruler across the part of the paper you wish to score. I used the grid on my paper cutter to ensure the mark will be perfectly straight across the paper.
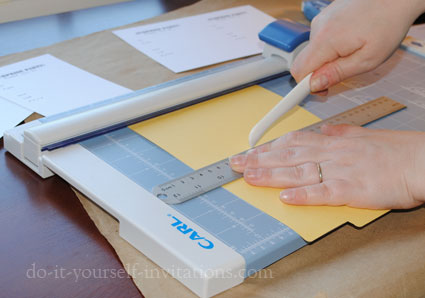 Press the scoring tool into the paper and drag across holding it against the edge of the ruler. The score should not be perfectly in the middle as to leave just a slight gap at the top of the folder. I measure to just about 4.75 inches form the top of the paper (not the tab) to make my crease.
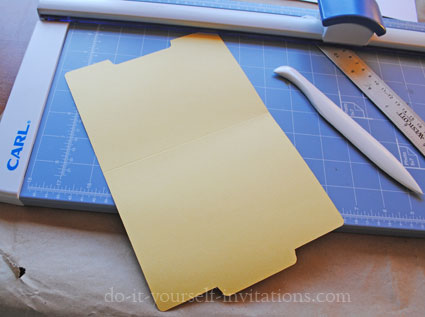 Fold the paper in half and smooth over the crease by running a bine folder or the edge of a ruler back over the fold.
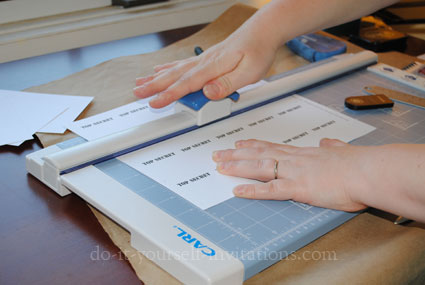
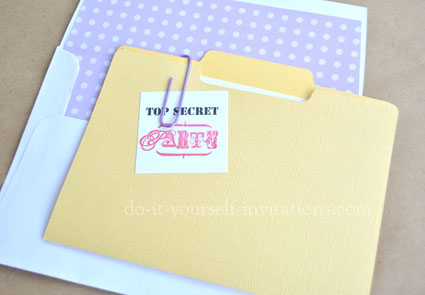
 Next print the invitation inserts for the inside of the folder. I also have provided a free invitation template for this as well! Simply print the template as is onto some 8.5" by 11" cardstock. I used white but any color will do provided that it is not too dark to read the type. After printing the inserts cut the paper into quarters to create 4 quarter page sized inserts per sheet. These inserts can be filled in by hand. To create the "Top Secret" labels for the font of the surprise party invitations I actually used the favor tags template from the wedding section of the site. Of course, you could also create some nifty matching favor tags for your party using the same template. To use the template simply type the wording (Top Secret) into the template and change the font to match the invitation. You can use any font you like! I used a stencil style font. You can download similar fonts for free from Dafont.com.
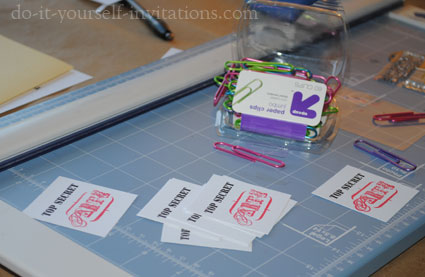
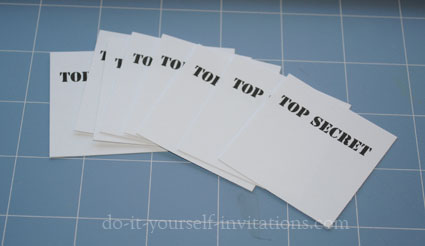 Print the template file onto some cardstock and trim the tags down to size. They are created to make 2" by 2" tags. To top off the tags stamp a cool party themed image onto the bottom part of the tag with some brightly colored coordinating colored ink. I used a "party" stamp with some bright red chalk ink!

 To finish the surprise party invitations simply attach the tag to the invite using a large paper clip. I snagged some over sized large colored clips from Target which worked very well with the whole design.
Optional Step:I also bought some A7 envelopes to fit my invitations into, so I decided to create matching envelope liners for the invites. I think they really pull the whole thing together!To create the envelop liners simply choose a decorative paper to coordinate with the colors you chose for the invitations. You can use wrapping paper, scrapbooking paper, etc... Hold your envelope over the paper and make a mark to judge how large you will need to cut the paper to fit into the envelope. You can also choose create a pattern of sorts form a piece of heavy cardstock and use it to cut several liners. Pop the liner into teh envelope and secure it in place with some adhesive. I use a strip of glue runner adhesive, but you can also use tape runner, double sided tape, or a glue stick.
More Ideas To Make DIY Surprise Party InvitationsI made these surprise party invitations with the help of one of my newest and most fun crafty toys. The Cricut Expression! The letters at the top of my invite were cut from the Plantin schoolbook font which many of the Cricut machines come with.This invitation is actually super easy to make. The base of the card is 8" x 8" textured cardstock. I cut the letters from a plain colored card stock and used some party themed decorative paper to create a belly band.
The base of this card is made by simply folding the 8" by 8" card stock in half. For my invitations I created an insert with my wording printed onto frosted vellum. A unique twist would be to glue a smaller envelope into the middle of the invitation marked "Top Secret" with the invitation details tucked neatly inside. Next I loaded some hot pink paper into my Cricut Expression personal cutting machine. I used up about 3-4 sheets of hot pink 12 by 12 card stock to create the letters for these surprise party invitations. Using the Plantin Schoolbook font cartridge I first cut many letter S's from a sheet at 1" in size. I had to make 50 invites so I cut 55 just in case I made some mistakes. I did the same to cut the 1" H's, 105 3/4" h's, and 55 5/8" h's. Using a craft glue in a bottle with a fine tip I adhered the letters to the front top of the invitations. Next I created a small belly band to fit around the middle of these invitations to add a little extra decoration. To make these belly bands I simply cut some 12 by 12 decorative card stock into strips. First I cut 1 two inch strip off of the end making the paper 12 by 10 inches. I then turned the paper and continued cutting 2" by 10" strips out of the paper. I wrapped the strips around the invitations and secured them in place using a strip of glue applied using a glue adhesive runner. For the final touch I tied a small ribbon around the band and into a bow. I snipped the ends off diagonally to give it a finished look.
|
The DIYI Ezine
Stay up to date with the newest tutorials, free printables and giveaways!
|
|||
|
|
||||
|
| Homepage | Shop | Wedding Invitations | Birthday Invitations | Baby Shower Invitations | Printable Invitations | Bridal Shower | Blog | Contact | Advertising Policy | Privacy Policy
By Chris Fleckenstein, Copyright © 2006-2013 Do-it-yourself-invitations.com |
||||
 Materials used to make these surprise party invitations:


