
|
|
|||||
|
Create Fabulous Homemade Wedding Invitations
OK so I know what many of you are thinking when you picture homemade wedding invitations. Just that; invitations that look like they were put together by an amateur.
|
||||||
I'm here to show you that making your own wedding invitations can be at least semi-easy (never as easy as simply paying someone and opening a box, right? - That is, unless you wallet is empty. Lol!), and it can be a lot of fun too! Nothing feels better than showing off those gorgeous, and unique to you homemade wedding invitations invitations after you have completed the project!
My Top Tips For Saving Money On Your DIY Wedding Invitations
- 1. Less is more (money in your wallet that is!). The less complicated your invitations are the less moula it will subtract from your wallet. So if you can forgo the smallest details such as extra layers of accent paper, or double ribbon tie-offs, it will all cost you A LOT less.
- 2. Always use a coupon. I never shop ANYWHERE without printing a coupon off the internet first, or searching for online discount codes. You can get HUGE bargains or even free shipping. All of the big craft chains offer discount coupons as well. Try Michael's, A.C. Moore, or Hobby Lobby online to print out a coupon before you shop. I always print a couple and try to snag a friend to bring with me for double the savings.
- 3. Utilize Your Scrap Paper. For many of my DIY projects I end up with all sorts of bits and pieces of paper left over. What do I do with them? I find creative uses! I create favor tags or envelope seals, or even paper punch confetti for part of my table decorations or to sprinkle inside the invitation envelopes.
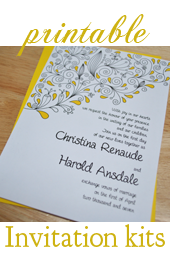
Part 1 - DIY Wedding Invitation Paper Kits. Yes super obvious I know! But there really are a ton of great kits available and the prices are great! Here's my tip for saving EVEN MORE money when shopping for an invitation kit.
First of all, most of us plan our weddings well in advance. Start shopping as far ahead as possible, and especially if you can wait until the off season. The reason? SO MANY of these kits go on sale or clearance when the traditional wedding season is over. If you are buying for your wedding that is set to happen next summer, then buy the invites in the fall of the present year! You'll save a bundle! One place that I tend to see these wedding invitation kits on sale a lot is the arts and crafts stores. They have a great selection! And if you do not have the time to shop off season scour your local newspapers and the web for coupons. I never, ever hit the craft store without a 40 or 50% off coupon in hand. I even print out more than one to hand to a random fellow shopper! These stores offer coupons every week which means big savings. Print a bunch of them and go with two friends! You'll be able to buy your entire wedding invitation suite for next to nothing! And this goes ditto for online shopping! ALWAYS do a internet search for coupon codes before checking out your goods!
Part 2 - Utilizing Cardstock. There are so many different sizes, colors, weights, and textures available in cardstock these days. It's beautiful. Cardstock will become the base of your homemade wedding invitations and therefore, your choice is very important. You can keep things cheap by choosing the correct size. If you have to you might want to alter the size of your invitations based on the cardstock you choose. The two most popular sizes you can come across in terms of unique colors and textures, is the 12 x 12 and the 8 1/2" by 11". But you can also find some in 11 x 17, and even legal size (81/2" x 14").
So for example, you find a cardstock that is the most perfect shade of lavender and matches your bridesmaids dresses and all, but it is only available in 12 x 12. In this case you should design your homemade wedding invitations to be 6' by 6". This is a logical and money saving choice as you can buy the paper in bulk or on sale (coupons anyone?) and then simply have it cut into quarters. Each sheet will create 4 whole invitations. OR you can have it cut in half and create a gatefold invitation. NOT as hard as it sounds and some copy or print shops may even do the folding for you!
Or maybe you are hard set to make a traditional 5 x 7 invite. Pick youth up some 8 1/2" by 11". Have them trimmed to size for you and keep the extra piece of cardstock that is left after trimming. Chances are you can create place cards or belly bands or something out of it.
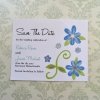
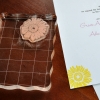
Part 3 - Blank Cards and Pocketfold Invitations. I myself LOVE using blank cards and pocketfolds when I'm creating cards and invitations! They simply make it so easy to create something wonderful and beautiful with so little effort. Want to try using a blank card to make your homemade wedding invitations? Pair it up with a well chosen rubber stamp, some really good ink in a couple different colors, and a few pieces of coordinating decorative paper. Oh and maybe some ribbon and raffia. You can even decorate th envelope with the stamp as well! Cannot. Go. Wrong.
Here's what you do to make fabulous homemade wedding invitations from blank cards:
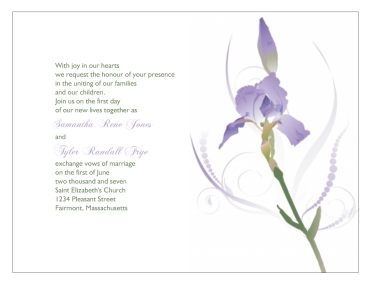
- 1. Print the wording for your invitations onto the inside of the card, or even just print it onto some vellum or white paper, and attach it to the inside of the card (btw there is a printable template you can use to make it easy to print your wording 4 to a page in order to glue to the inside of a card).
- 2. Use the rubber stamp to create a graphic for the front or inside of the card. A nice touch is to print your wording onto white paper and then stamp the image in a strategic location on the paper. Try aligning the text to the left or right for clean lines and makes room for the image to sit.
- 3. Use the decorative paper to create a belly band by using a personal paper cutter to cut the paper into strips. wrap the paper around the outside of the card and secure it with a strip of glue from a glue runner, or even a glue dot.
- 4. Last add a finishing touch by tieing a thin ribbon or some raffia around the bellyband. Finish it by tying a knot or a bow.
Pocketfolds are a very popular choice, and blank pocketfold invitations are quite easy to use for making handmade wedding invitations. My easy as pie solution?
Here's what you do to make easy homemade wedding invitations from blank pocketfolds:- 1. First you got to choose a coordinating pocketfold and decorative paper. This could be the 12 by 12 scrapbooking paper you can buy at the arts and crafts store (which comes in fabulous varieties I must add), or a handmade or japanese paper. Measure the inside of the pocketfold (the area where your invitation wording is supposed to go, and have your paper cut just a tad bit smaller than this. Say by 1/4" or so.
- 2. You will also need to print your wording onto some plain white paper. I recommend a high quality linen or cotton paper for a very rich looking invitation. You will want to try to print the wording several times on a page to conserve paper (and funds). An easy way to do this is to print onto 8 1/2" by 11" and use one of our free printable templates.
- 3. Cut the paper in which your wording appears to a slightly smaller size than the decorative paper you cut previously. Again maybe by 1/4" or so. Example - invitation size is 5 x 7; cut decorative paper to 6 3/4" by 4 3/4", and cut the white paper to 6 1/2" by 4 1/2".
- 4. Layer the papers to the inside of the pocketfold. I recommend using a permanent adhesive glue runner. Try to use sparingly as it can get expensive if you over-do it. Start by attaching the decorative paper as centered as possible, and then layer the white paper with your invitation wording over the decorative paper, centered as best as you can.
A very easy solution to make a fabulous invitation! Now just rinse and repeat using cardstock and the same decorative papers to add an RSVP and whatever else floats your boat.
Part 4 - Visit A Copy Shop. Yes this serves many purposes and all of them make your life easier. When planning a wedding you have enough on your mind, so the last thing you want is to worry about hand cutting 150 pieces of high quality cardstock, decorative paper, and who knows what else. Yes, you can bring your paper (the whole stack and I mean all of em') have them printed onto, and cut. Even if you do not have them copied, (most of the time I just print them at home from my computer which really isn't that stressful, and I get to play solitaire while I'm at it) you can always bring your printed papers and cardstock and whatnot and just have it cut to size. And do you know what? The service is cheap! I was utilized this service just this past weekend for a project I was working on and it only cost me $5.00 to have 100 sheets cut. Because they do not charge by the sheet, but by how many times they have to cut. Since they cut the entire stack all at once (it's a big machine), we are talking maybe 2-4 cuts depending on what you're project is. Even if it is a lot more than 2-4 cuts it is well worth it not to have to do it yourself!
That being said, many of these places also have folding services. There are machines made to fold a paper to a brochure fold (like a zig-zag), and gatefold as well.
Part 5 - Enlist Help! Call your girlfriends, your bridesmaids, your favorite aunt, whoever might be obliged to help you out, and have an invitation making party! If you have had all of your papers cut for you, and the wording is all printed out, then all you must do is make an assembly line. Assign some tasks and go to it. You can have all of your invites done in no time! You can even make it fun by putting our snacks and opening a bottle of wine or two. Play some music and just have fun with it.
With all of these tips you're sure to be able to come up with an easy homemade invitation that will be totally one of a kind and the perfect invitation for your style and personality. Good luck!
Do It Yourself Invitations Homepage > Make Your Own Wedding Invitations > Cheap Homemade Wedding Invitations Ideas
- 1. First you got to choose a coordinating pocketfold and decorative paper. This could be the 12 by 12 scrapbooking paper you can buy at the arts and crafts store (which comes in fabulous varieties I must add), or a handmade or japanese paper. Measure the inside of the pocketfold (the area where your invitation wording is supposed to go, and have your paper cut just a tad bit smaller than this. Say by 1/4" or so.
The DIYI Ezine
Cheap DIY Invitation Ideas


Printable Invitations | Bridal Shower | Blog | Contact | Advertising Policy | Privacy Policy
By Chris Fleckenstein, Copyright © 2006-2013 Do-it-yourself-invitations.com