|
|
|||||
Make Your own Wedding Invitation EnvelopesTips, Ideas, and Templates for Creating Unique Wedding Invitation Envelopes
When I want to make something really special and handmade, I don't stop at creating the wedding invitations, but even go on to making handmade wedding invitation envelopes to match. The results are stunning! Yes, this kind of project can be tedious. But if you are ambitious and have a lot of help then go for it! You'll be glad you went the extra mile. I promise.
Supplies and tools needed to make your own wedding invitation envelopes:
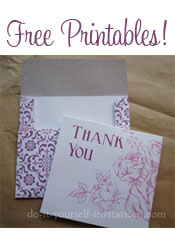
Use our printable envelope template as a pattern for hand trimming the cardstock into handmade envelopes. The templates come in two sizes. The smaller size if for an invitation or card sized at 5.5" by 4.25" (or A2 envelope). The second template is for a larger invitation size and will fit a 5" by 7" (A7 envelope) card or invitation. I also quite like the idea of using both for a matching set of wedding invitation envelopes which can fit one inside the other. The smaller can be for a reply card or enclosure card to fit inside the invitation envelope.
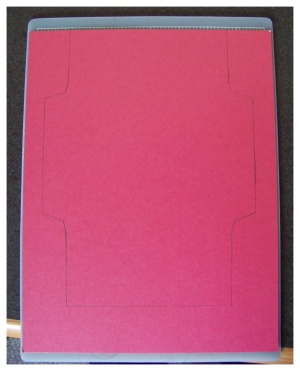
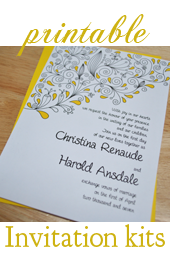
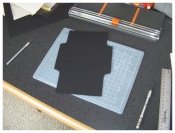
How To Make Homemade Wedding Invitation EnvelopesStep One: Start by printing the envelope templates. There are two ways that you can use these templates. For one, you can print the template onto some heavy card stock to create a stencil. This is what I did to create the invitations on this page. You simply use a pencil to trace the shape onto your chosen card stock and cut each one out using the lines of the stencil as a guide.You can also choose to print the template straight onto your chosen card stock and cut out the shape of the envelope using the template as a guide. Do be sure to cut just inside the lines to hide them! For those of you with die cutting machines, you could even upload these to cut using your Silhouette or Robocraft! Makes a great solution for resizing to fit any sized invitation with ease!
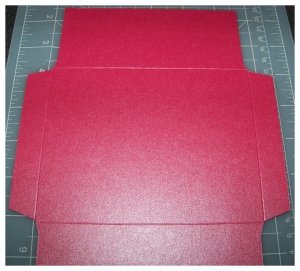
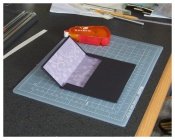
 Step Two: Cut the card stock using a personal paper trimmer to create the wedding invitation envelopes shell. I recommend using either a trimmer with a sliding attachment (scoring attachment too, will come in handy later) or use cutting blade (like an exacto knife) along with a cutting mat. Using the exacto knife will take longer most likely but you have a bit more control. Use whichever works best for you or what you have on hand.
To score the paper correctly find the places on the envelope that you want folded and line them up with the scoring tool or ruler. There will be a clear line on the paper trimmer at which to line it up with. Slide the scoring tool over the paper and Viola! Repeat this step on all flaps that need to be folded.
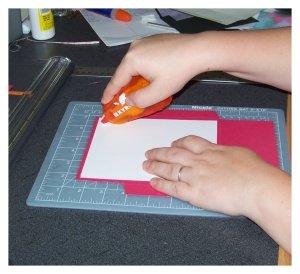
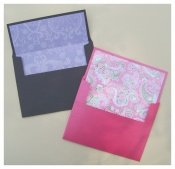
 After scoring fold each flap into place and smooth over any creases with your bone folder or any smooth flat object, such as the edge of a ruler or the side of a pen. Step Four: Cut out the lining for your wedding invitation envelopes. Many scrapbooking papers come with a grid of cutting lines on the back to make this part really, really easy. Otherwise there is a liner included in my printable envelope templates. Simply cut out the paper to the appropriate size and then score it where the fold of the envelope will be. The easiest way to score it I think, is to simply hold the paper in place so that it is centered between the middle part of the envelope. Hold a ruler across the fold as a guideline. Now use a bone folder or similar tool/object (something a bit pointy) and run it over the score in the envelope. You'll get an instant score. It is easier to achieve because the decorative paper is thinner than card stock or heavier papers you may choose to use for your envelopes. Step Five: Glue the liner into place. My favorite glue to use is a permanent adhesive glue runner. These little tools are awesome because they are super easy to use and make no mess whatsoever. Plus, they will not warp or wrinkle the paper like other adhesives and glues will. You need a very minimal amount for the paper to stick. Simply roll the glue on the outer edges and near the seam where the paper will fold.
 Step Six: Lastly you will fold the flaps of the envelopes into place. Simply apply some glue or adhesive to the flaps and fold the bottom flap upwards. You've created beautiful matching wedding invitation envelopes for your homemade invitation suite!
|
|
|||||
|
|
||||||
|
| Homepage | Shop | Wedding Invitations | Birthday Invitations | Baby Shower Invitations | Printable Invitations | Bridal Shower | Blog | Contact | Advertising Policy | Privacy Policy
By Chris Fleckenstein, Copyright © 2006-2013 Do-it-yourself-invitations.com |
||||||
 The one problem I sometimes run across when making handmade invitations is finding the envelopes to match. If you are not too picky, finding an envelope that is at least acceptable is not too hard. But what if you really want a matching set? What if you just plain have something in mind that you can't find anywhere? The best way to get exactly what you want is to make it yourself.
 The best way to cut these out is to cut just within the lines so that you are not left with any icky black ink or pencil marks on the inside of your wedding invitation envelopes.
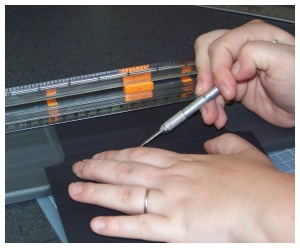 I really like to score paper using a bone folder and a ruler, but some may find it just as easy to use a scoring attachment on your sliding paper trimmer. Again, use what works for you or whatever you have on hand. I have been know to score paper with the pointed end of a paint brush or even a ballpoint pen that has ran out of ink. An old chop stick. You get the picture! ;-)