|
|
||
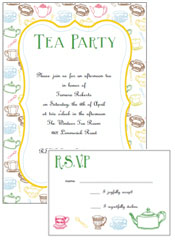
Make Your Own Tea Party Invitations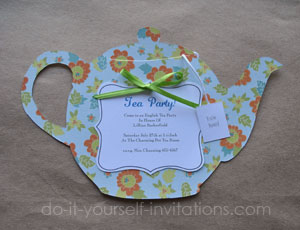 These cute-as-can-be Tea Party Invitations are easy to make and will definitely be a homemade invitation your guests will remember! I made these with some decorative paper in patterns made to resemble retro and antique linens. These cute-as-can-be Tea Party Invitations are easy to make and will definitely be a homemade invitation your guests will remember! I made these with some decorative paper in patterns made to resemble retro and antique linens.
You can make this invite for just about any occasion from a baby shower to a little girl's birthday party, simply by switching up the paper and patterns you use/
I have created a printable tea pot pattern/template as well as a customizable text template to help you re-create these crafty little teapots. These could also be used to cut with your home die-cutting machine for an easier and faster homemade invitation.
DIY "Tea Pot" Tea Party Invitations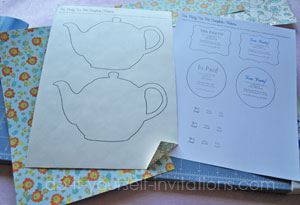 Start by downloading our printable tea pot pattern and invitation template. The tea pot pattern can be used by either printing it onto heavy cardstock and tracing it onto your favorite papers, or print straight onto your chosen papers and trim on the lines with a pair of scissors or a craft knife. Start by downloading our printable tea pot pattern and invitation template. The tea pot pattern can be used by either printing it onto heavy cardstock and tracing it onto your favorite papers, or print straight onto your chosen papers and trim on the lines with a pair of scissors or a craft knife.
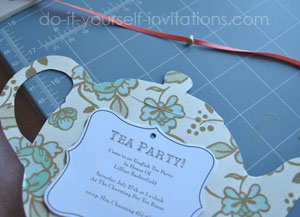
I chose to print straight onto the back of some decorative paper. I used a small pair of scissors to carefully trim the paper from the lines. You could also choose to use your personal die cutting machine to cut quantities of these tea pots. I also used a craft knife to cut a slit for the opening to the lid of the tea pot.
Print the text templates onto some heavy white cardstock. I found it was also easiest to trim these by hand with scissors or a craft knife. The tea bag labels could be cut using a paper trimmer or scissors.
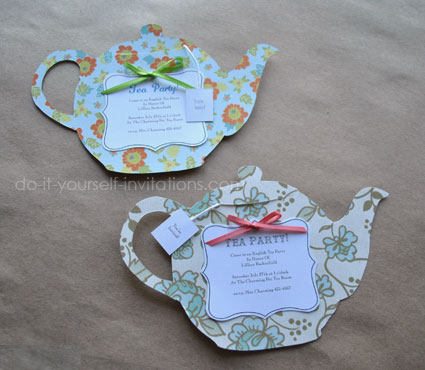
Cut a small length of ribbon for the front of the tea pot invitations and insert the sharp end of a brad through the center point of the ribbon. Place the brad through the holes you punched and open it to the back to hold the papers together.
|
|
||
|
|
|||
|
| Homepage | Shop | Wedding Invitations | Birthday Invitations | Baby Shower Invitations | Printable Invitations | Bridal Shower | Blog | Contact | Advertising Policy | Privacy Policy
By Chris Fleckenstein, Copyright © 2006-2013 Do-it-yourself-invitations.com |
|||
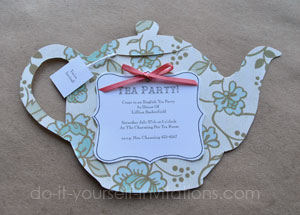
 Use the customizable text portion of the template to personalize your tea party invitations by entering your own wording, and changing the fonts, and text size and colors to match your invitation and party style. I also included a template for making little tea bag labels to hang from the opening of the tea pot lid. :-)
 Hold the text/wording print-outs over the paper tea pots to center the pieces together as best as you possibly can. Use a small hole punch to punch a hole through both papers to fit a brad for holding both pieces together.
 You can now tie the ribbon into a bow and trim the ends to the correct length. Lastly, glue or tape some string or baker's twine to the back of the tea bag label and then also to the back of the invitations. Slide the label through the slit you cut for the tea pot opening so that it hangs over the front to emulate a tea bag steeping in hot water.