
|
|
|||
|
DIY Stocking Christmas Party Invitation
|
||||
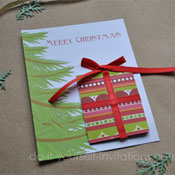
 This super cute Christmas party invitation is perfect for a quaint holiday get together. It can even double as a dazzling christmas card for all of those special people on your homemade gift giving lists.
Create Your Own Christmas Stocking Invitations!

Materials and supplies list:
- 8 1/2" by 11" cardstock
- decorative fabric or paper
- white felt or fleece
- ribbon
- Stocking Pattern
- editable invitation template
- sewing supplies needle and thread, sewing machine, or liquid stitch
Step One: Download and print the free mini stocking pattern. Print the pattern onto some heavy paper of your choice. I just used some cardstock I had on hand.
Trim the stocking pattern from the paper. (There is also a smaller pattern for mini stocking for sticking on the fornt of greetings cards or any sort of random christmas paper craft cardmaking you might want to try.
Step Two: Choose a fabric of your choice to create the stocking christmas party invitation with. I chose some scraps of Christmas theme flannel I had on hand.
This is a great project for using up leftover fabric from your sewing projects. You can even try using Freecycle.net to see if anyone local has some leftover fabric scraps you could use.
Iron your fabric and fold it to make two layers, with the fronts facing inward. Place your stocking pattern on top of the fabric. Using a marker or invisible ink sewing marker trace the pattern onto the fabric.

Step Three: Trim the top part of the pattern only, leaving a straight edge at the top of the fabric stocking piece.
And on to the sewing...
I chose to machine sew my mini stocking. I simply sewed right along the lines I traced onto the fabric from the pattern.

You could also easily hand stitch these with a simply straight stitch, or use some liquid stitch sewing glue!
After sewing trim the edges to about a 1/8 to a 1/4 of an inch. Turn the fabric right side out and press it with an iron a second time.
For those using sewing glue, make sure and wait for the glue to dry before attempting to iron. Follow the instructions on the packaging for the safest procedure.
Step Four: Add a felt "cuff" to complete this cute Christmas party invitation. Using the second part of the pattern cut two rectangular shapes from some felt or fleece.
Attach these to the upper part of the stocking using some Liquid Stitch sewing glue. (Or hand stitch it if you would like to!)

Make sure to apply some glue to the outter edges as well. Let this dry completely.
In the meantime...
Step Five: Now let's create the card insert!
I've created this nifty editable and printable christmas invitation template for you to snag to help create these invites. Start by downloading the template and opening it up with the lastest version of Adobe Reader. Most of you should have this already installed on your computers. But if you don't, no worries - you can find it free on the internet by going to Adobe.com.
Once you've got the template open you can change the wording, fonts and text colors to match your party style. To change the text just highlight the part you want to change and press the CONTROL button and the letter "E" at the same time. This will bring up a tool palette. Play with the text to your hearts content!
Once you've got it right print the template onto some heavy white cardstock. Cut the paper into quarters! Each sheet will create 4 flat card inserts to fit inside your stockings.
You can also choose to create Christmas greeting cards instead! OR your could forgo the paper part altogether and make cute holiday decorations or use the stocking as a cute gift wrap!
For one last added touch I cut some little pieces of ribbon and attached them to the upper right corner of the card in a little loop. This way when it is tucked into the stocking it looks like the little loop that you usually hang your stocking with. It also serves as a cool way to pull the invite out of the stocking!
Just tuck the card inserts into the stockings and you're done. You've just made a fab christmas party invitation that everyone will remember for a long time! Enjoy!


Do It Yourself Invitations Homepage > DIY Party Invitations > Christmas Party Invitation
The DIYI Ezine
You May Also Like


Printable Invitations | Bridal Shower | Blog | Contact | Advertising Policy | Privacy Policy
By Chris Fleckenstein, Copyright © 2006-2013 Do-it-yourself-invitations.com