Make Your Own Thanksgiving Invitations
These Modern Rustic Thanksgiving invitations are unique AND very easy to make. I purchased the A4 scallop card at Staples and simply embellished it to fit the season. These were also SUPER AFFORDABLE using great Turkey themed stamps from the $1 dollar bin at Joann Fabric. ANY Thanksgiving or fall themed stamp will do! These were a big hit amongst our dinner guests. A great way to kick off my absolute most fave holiday!

Supplies used to make Thanksgiving Invitations:
A4 scallop cards from Staples
Turkey clear rubber stamp
stamping ink
(optional) matching envelopes
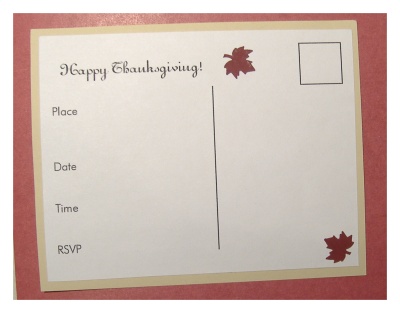
These invites were SO simple to make. I started by printing the invitations wording onto the A4 cards. You can use pretty much any software you may have on your computer to accomplish this. Simply set up the file to change the dimensions of the page to A4 or 4.25" by 5.5".
I chose to use a rubber stamp I scored while rummaging in the dollar bins at the craft store. They generally keep a few seasonal low priced stamps and other $1 supplies near the cash registers at most popular arts and crafts stores, such as Michael's, Joann, or A.C. Moore. Since I knew which stamp I would be using I made sure and measure how much space I would need to leave blank on the card to leave room for the images. You can adjust sizing by creating margins at the edges of the document, or choose to view rulers and judge it by eye.
After printing the wording onto my scallop cards I then prepared to stamp the images onto my Thanksgiving invitations. Since I used a nice deep red color for the "thanksgiving" title printed onto the invitation, I decided to go with a plain black ink to add a sort of rustic image. Make sure and purchase a good ink if anything. I find that I am almost always disappointed when I buy a cheap ink (i.e the stuff in the $1 bin). Always check to see if there is a clearance bin or aisle to see if you can get a good quality ink for less money. I really like chalk ink too!
The stamp I used was a clear stamp. Clear stamps need to be mounted onto a clear acrylic block in order to use them properly. If you buy just one good acrylic block you can use it again and again for a myriad of clear stamps. They simply cling on their own. You can remove them, place em' back in their packaging, and take them out again when you need them!
I like to use a nice big block for most projects. The block I use has a grid on the underside which is VERY helpful in lining up your stamp within your project. I simply lay the block right down on top of my project and use it to judge just where I should mount the stamp. I then use the grid to line up with the edges of my project to make a nice even and straight stamped image EVERY time!
To finish things up I simply stamped the images I chose onto each and every of the Thanksgiving invitations. The ink dries very quickly so at that point I was mostly one!
More Tips and Ideas to Make These Invitations...
It just so happens that there was a bunch of matching envelopes for sale right next to the scallop cards I chose. SO although I intended to create Thanksgiving postcard invitations, I was inspired by the envelopes and picked up a couple packs. I used my rubber stamp to embellish the outside of the envelope to match the invitation. My guests were tickled pink! You could even consider going one step further and creating envelop liners from some decorative paper, or simply stamp the images onto plain paper to create a pattern.
 You can turn these invitations into a postcard pretty easily. Don't forget to check with the post office for the correct widths and sizing for sending postcards!
To start download the printable Thanksgiving postcard template. I also have a printable template for creating quarter page sized Thanksgiving cards from regular cardstock. They already have some wording on them. Perfect if you want a title on the front of the postcard but would like to include the party details on the back.
Do It Yourself Invitations Homepage > DIY Party Invitations > Thanksgiving Invitations
|


