|
Make Your Own DIY Onesie Invitations
Onesie invitations are becoming ever popular in the baby shower world, and appropriately. What would be a better or more fitting theme to model your baby shower after? One of the most popular invitations is a card that is shaped like a onsie. But I wanted to do something a bit different while staying on the onesie theme. I wanted clean and simple, and cute. Here is what I came up with!
 Tools and materials used to make onesie invitations:
blank cards
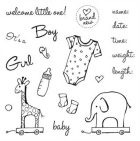
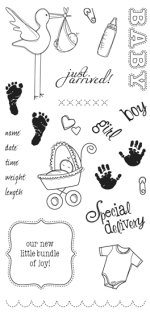
clear stamps - Fiskars "The Stork Has Arrived"
acrylic block (for clear stamps mounting)
stamp pad with black ink
patterned paper
colored markers
craft glue
I started with a plain ol' blank white card to put this very simple and clean baby shower invitation together.This could easily be made into a baby birthday invitation, or a simple baby gift card.
The first step I took to complete the onesie invitations was to stamp the onesie image onto some decortaive patterned paper. I actually had a bunch lying around from a
 baby shower themed pack of scrapbooking paper I purchased for my kids baby books. So I chose a small paper with a small and appropriate pattern and went to town. The image I chose to use was from a set of clear stamps, so I had to mount the image myself using a clear stamping acrylic block. I LOVE clear stamps as they are so much more easy to use than the traditional wood mounted stamp. You can actually see exactly what and where you are stamping. Although in this case that point is moot, since we will be simply imprinting the image many times onto a sheet or two of patterned paper. It does not matter where they appear on the paper as the images are intended to be cut out. baby shower themed pack of scrapbooking paper I purchased for my kids baby books. So I chose a small paper with a small and appropriate pattern and went to town. The image I chose to use was from a set of clear stamps, so I had to mount the image myself using a clear stamping acrylic block. I LOVE clear stamps as they are so much more easy to use than the traditional wood mounted stamp. You can actually see exactly what and where you are stamping. Although in this case that point is moot, since we will be simply imprinting the image many times onto a sheet or two of patterned paper. It does not matter where they appear on the paper as the images are intended to be cut out.
 So to stamp the images onto the paper, I merely mounted the clear stamp to my acrylic block and went to town! I used a plain black ink to imprint the little onsie images. I really recommend using a good ink pad to stamp with. It makes a big difference in the ease of stamping, and how crsip and clear the image will appear. Resist those little $1 stamping pads in the bargain bin at the craft store! So to stamp the images onto the paper, I merely mounted the clear stamp to my acrylic block and went to town! I used a plain black ink to imprint the little onsie images. I really recommend using a good ink pad to stamp with. It makes a big difference in the ease of stamping, and how crsip and clear the image will appear. Resist those little $1 stamping pads in the bargain bin at the craft store!
After stamping the images I set to work with a small set of sharp scissors to cut all of the images out from the paper. A small craft knife may b a good thing to have on hand as well. Sometimes it is easy to get around any detail areas with a craft knife instead of scissors. I like to keep an Xacto knife around for just this kind of work.
 Now to get everything assembled onto the card. I started by useing a circular drafting ruler to draw a half moon line across the top of the card to form the little "clothes line" to place the onsies onto. You can pretty much use anything circuler shaped you may have lying around the house. A cup, bowl, or small plate. Whatever you have on hand will work fine. I used a fine tipped black marker to draw the line. Now to get everything assembled onto the card. I started by useing a circular drafting ruler to draw a half moon line across the top of the card to form the little "clothes line" to place the onsies onto. You can pretty much use anything circuler shaped you may have lying around the house. A cup, bowl, or small plate. Whatever you have on hand will work fine. I used a fine tipped black marker to draw the line.
To finish the card a bit more I also stamped a little "Welcome Little oNe!" wording onto the bottom left hand corner of the card and followed it with a line of alternating heart shaped safety pins and little hearts. All of these images and wodings were included in the clear stamp set I was using. After stamping the card I went back and filled in the hearts and safty pins with coordinating colored ink using some colored markers. I used blue and green patterned paper for the onesies, so I alternated the same colors into the hearts and safety pins.
 For the last step to finish the onesie invitations, I glued the little paper onesies to the front of the invitations to make them look like they were hanging on a clothes line. I started by placing the onesies to the outer edges, and then centering two more between them, for a nice, even, uniformed look. For the last step to finish the onesie invitations, I glued the little paper onesies to the front of the invitations to make them look like they were hanging on a clothes line. I started by placing the onesies to the outer edges, and then centering two more between them, for a nice, even, uniformed look.
As for the inside of the inivtation, you could finish it several ways. Some rubber stamps and even clear stamps have invitation wording stamps. These are basically made to stamp on and then fill in the pertinent information. I also like to print the wording straight to the inside of the card, which is probably the most simple solution. The third solution is the most time consuming but I like it the best, as I really delight in the little details. I like to cut a bit of the patterned paper I used for the onesies on the front of the invitation, into rectangles just a bit smaller then the insde of the card. I then print the wording onto another sheet of white or light colored paper, and cut this into another rectangle just a bit smaller then the first. I then glue both to the inside of the card using a permanent glue runner layering one on top of the other. It gives it a very finished and crafty sort of detail!
|