|
|
|||||
|
N'awlins Bound Pocketfold Invitation
by Ericka Hughes
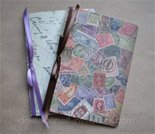
Materials and Supplies List Instructions 1. Cut the main color cardstock to 5-3/4" x 12" (set aside remaining sheet to create pocket later) 2. Score the cut paper at 3" on each end. You can do this using the scoring attachment on your paper trimmer or by using your bone folder and a ruler. Scoring the paper in this manner will allow you two 3 inch folds with a 6" center for the invitation. 3. Use bone folder to fold flaps towards the center of the invite 4. Using the remaining portion of paper (that remained after the first cut) cut this sheet to 7-3/4" x 6" 5. Using paper cutter with scoring blade attached score the cut paper at 1" from one end and 2" from the opposite end (this is to create the pocket...so make sure you are scoring across the shortest width) 6. Use bone folder to fold flaps toward the center of the page 7. Turn the Paper the long way with the 1" fold towards the top of the cutter and using the cutting blade attached cut 1/8" of an inch off of each side paper down TO the 2" fold line. (Important!!!! Do not cut past the 2" fold line). Use scissors or a craft knife to snip off the 1/8" strips at the fold line. 8. With the paper in the same position starting at the 2" fold line use the scoring blade to score 1/8" on each side of the remaining 2" section (you are basically creating tabs for your pocket) 9. Fold the 2" Flap up to create a pocket....you should have a small tab on each side of the pocket fold these to the inside of the pocket (so they are not visible) 10. Use glue/adhesive along the small 1/8" tabs you have just created and secure them to create the pocket. 11. Put glue along the back of the 1" fold at the top of this sheet and attach this section to the bottom center of the main invitation. 12. You should now have a tri-fold invitation folder with a fold down pocket attached 13. After creating the pocketfolder, I then cut a piece of the coordinating cardstock at 5-3/4" x 5-3/4" and glued it to the center of the invitation, covering where I attached the pocket fold and another 5-1/2" x 5-1/2" piece of parchment with our invitation printed on it to the center of that piece. You have several options from this pointon. For mine I put a piece of cardboard in the center to protect the invite placed a fleur de lis template over the center and cut around it with a craft knife. I then cut out the coordinating cardstock and glued it to the inside behind the cutout. A second alternative, instead of creating a tri-fold, is to create a single fold to do this instead in the second step on these instructions doing the 3" scores and folds do one score and fold at 6". This will basically allow you to fold the cardstock in half and create a single fold that allows the invite to open on the right hand side. You can then follow the remaining steps and you have the option of putting the pocket on the left or right side of the card. |
Popular DIY Tutorials |
|||||
|
|
||||||
|
| Homepage | Shop | Wedding Invitations | Birthday Invitations | Baby Shower Invitations | Printable Invitations | Bridal Shower | Blog | Contact | Advertising Policy | Privacy Policy
By Chris Fleckenstein, Copyright © 2006-2013 Do-it-yourself-invitations.com |
||||||