|
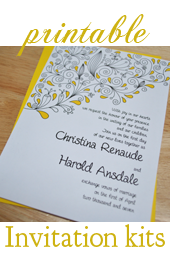
Make Your Own Wedding Invitations Using Our Printable Template
Want to make your own wedding invitations without looking "homemade"? You can make your own invitations easily with our printable wedding invitation kits! Make stylish and elegant, yet cheap wedding invitations using these simple steps.
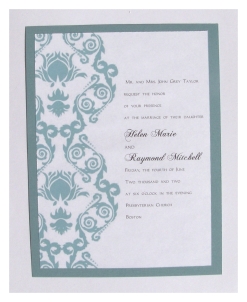
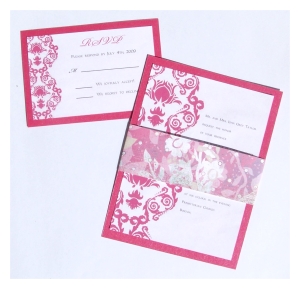 These invitation were made with our Damask template. The damask template is available in many colors, with a matching RSVP and Thank You note. We can even create a matching menu card, invitation map, table numbers, place cards, programs, whatever you may need or can think of! Just contact us with the specifics of what you'd like and we will get back to you right away with a price quote and invoice payable to Paypal.
These wedding invitations were super easy to make. I simply printed the damask wedding invitation template onto high quality 24 lb. white cotton paper and backed them with a sturdy decorative cardstock.
The templates are also versatile! You can use this same template to create a pocketfold, or gatefold invitation, or even a seal and send style invite. All you need to do is trim the template down to different sizes in order to fit onto different sized card stock or pocketfolds. Use a good quality adhesive to attach the papers together.
Using the Damask Template To Make Your Own Wedding Invitations
Step-By-Step:
1. Start by printing the template. Make your own wedding invitations by changing the wording on the template to match your event by highlighting the text with your mouse and holding down CONTROL+E. Change the wording, size, font, or color of the text. Print it onto a high quality paper using the highest quality settings for your printer. Print one test copy to start with to make sure the colors are printing the way you want them to look. Once you are satisfied print enought to make all of your invitations. The templates are designed to create 2 invitations per single sheet of 8 1/2" by 11" paper.
 2. Trim the invitation templates down to size. Each template is set up with cropping marks to make trimming a no brainer. To do this try using a good quality paper trimmer with a sharp blade, or you can even take the paper to a local copy or print shop to utilize their paper trimming services. It should cost you under $5 in most places. It is so super fast and cuts out a huge amount of tedious work. 2. Trim the invitation templates down to size. Each template is set up with cropping marks to make trimming a no brainer. To do this try using a good quality paper trimmer with a sharp blade, or you can even take the paper to a local copy or print shop to utilize their paper trimming services. It should cost you under $5 in most places. It is so super fast and cuts out a huge amount of tedious work.
You will also need to trim the cardstock as well. If you are using a card stock that is sized at the standard 8 1/2" by 11" then you can get by with simply cutting it in half. Otherwsie you will need to trim it to the proper size.
3. Use a good quality adhesive to hold the papers together. I recommend using a permanent adhesive glue runner. I use Xyron brand glue runners. They make the job so easy and mess free, AND they really hold your papers together well! There is no wrinkly goopy mess to contend with!
4. (Optional) You can also add a belly band like I show above, or wrap around some ribbon. I have seen embossing ink added, as well as glitter, and rhinestones.
To add a belly band simply cut some decorative matching paper into 2" by 12" strips and wrap them around the invitations. Secure them in place with a strip of glue from your glue runner or using glue dots. Ilike to use 12" by 12" scrapbooking background paper in making my belly bands. It adds a nice touch to tie a ribbon aroun the belly band, or even some raffia.
Helpful Products
Do It Yourself Invitations Homepage > Make Your Own Wedding Invitations > Printable Damask Invitations
|