Follow Me on Pinterest


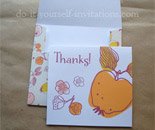
Fall themed Save the Dates

by Caryn Gehrke
(Ingleside, IL)


These were created using Bazzil cardstocks and Cricut cartridges. The cream color paper was sent through the printer to have our names, date and location printed on them. I then added the die cuts of "Save the Date", the branch and leaf (which has the date written on it).

The most difficult part was the frame. I couldn't find pattern paper that I liked, so I decided to make my own. I used small stamps with our intials (C+J) and stamped across the entire page. This took FOREVER, but the custom look was well worth it! The frame was cut also using a Cricut die cut.

I experimented with different types of glue. I'm actually a scrapbooker more than a card designer, so my works of art are normally placed under page protectors. I found spray adhesive worked the best to ensure the die cuts were fully glued down to the paper. I also used a 3d adhesive square on the leaf to make the date stand out a bit.

Finally, I added a few Swarvorski rhinestones to resemble berries on the branch.

Join in and write your own page! It's easy to do. How? Simply click here to return to DIY Wedding Invitations.


Popular DIY Tutorials


Homepage DIYI Blog Contests Shop

do it yourself invitations

Wedding Invitations Bridal Shower Reader Submitted Wedding Invites


do it yourself invitations

Birthday Invitations Party Invitations Baby Shower


Printable Invitations Printable Wedding Invitations Custom Printable Templates Invitation Maps


make your own invitations

Cardmaking Tips Thank You's


Contact Our E-Zine Search/Sitemap About Sponsor A Contest Resources/Links


[?] Subscribe To
This Site

XML RSS
Add to Google
Add to My Yahoo!
Add to My MSN
Add to Newsgator
Subscribe with Bloglines