Elegant Black,Red and White Wedding Invitation
by Amy Leiter
(Tahlequah, OK usa)

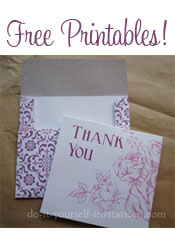
DIY Black and White Damask by Do-it-yourself-invitations.com

DIY Black and White Damask by Do-it-yourself-invitations.com
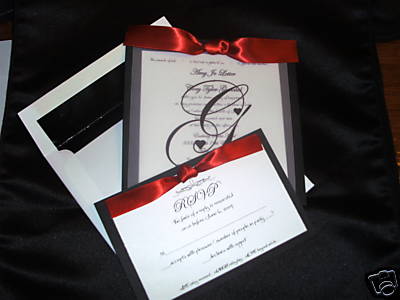
To make these invitations start off with a 6 X 6 piece of black card stock. Print the invitation information on white card stock and attach (I used double sided tape) to the black card stock backing.
I then printed my future last name initial - with added hearts for an extra touch - on to clear vellum paper. I then tied it all together with a red satin ribbon! I don't know of a more simple wedding invitation ensemble and I have had NOTHING but RAVE reviews from my family and friends!!!
UPDATE
by Do-it-yourself-invitations.com
We have had such and overwhelming response in comments from people wanting to know more about this invite that I decided to write a quick tutorial for you all. I think in the future I will make a complete tutorial with step by step pictures and all, but for now, here's the details sans pictures.
Supplies:
black cardstock
white paper
printable vellum
ribbon punch
satin ribbon
You can buy most of your paper and envelopes from any office supply store like Staples. Visit a craft store to purchase a ribbon punch and some ribbon for holding the invitation pieces together.
Start by printing the wording for your invitations. Most paper comes as 8 1/2" by 11" sheets. When creating a large quantity of invites it is generally easiest to print the wording twice on one sheet side by side, so that all you have to do is cut the paper in half and trim to size to create two invites per sheet. There is a free template to get started with on the printable page of this website. Type your wording and center it. Print the wording onto some heavy white paper.
Follow the same step above for printing the monogram initial onto vellum. One of the most common questions I've gotten regarding this invite is "what is the name of the font used?". The problem is, I don't think there is one. Most likely the bride who created these constructed her own monogram using a paint program or Photoshop, and inserted her own hearts.
There is one font that I know of that is similar in that it has little hearts incorporated into all of the capitol letters. It's called Love Light. But if in the event that you simply MUST HAVE something more like the one above, you'll need to download a free program, like Paint.net and create your own monogram. I do think the font shown here may be Edwardian Script, with little hearts added in.
So, like the other wording, you'll want to print the monogram onto some printable vellum so that the lettering is set up side by side, 2 to a page.
Bring all of your paper to a local print or copy shop and have them cut it for you. Trust me, it is so much easier this way AND the paper will be cut perfectly which is HUGE for a really nice professional looking finish. And it's usually really easy on the wallet so well worth it.
Have your black cardstock cut to 5 by 7. This is a good standard size to use as you will have an easier time finding envelopes. Have the plain white paper (with your wording printed onto it) cut to around 4 1/2" by 6 1/2", and the vellum cut just a little bigger than the white paper. Everything will cost a lot less because of the fact that you set everything up to print side by side, from the actual cost of ink and printing right down to the cost of cutting the paper. Now all you have to do is bring them home and assemble them.
This is the part when it is fun to get some friends or family together, pop out a bottle of wine, and get a little assembly line going. You'll be done in no time!
Layer the papers together with the black cardstock at the bottom, the white paper layered on top, and the vellum on top of everything. Center the papers as best as yo can manage and use a ribbon punch to punch the holes right into the top center of the invite. Thread the ribbon through the top, overlap in the back and back out to the front again. Trim the edges of the ribbon and your done!
More DIY Black, White, and Red Wedding Invitations


With so many requests for black, white and red wedding stationery (and other combinations of black and white with color) I decided to add my suggestion for a DIY and reasonable easy to make invite using one of our printable templates.
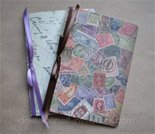
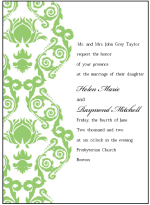
The template is one of our most popular, black and white damask, but I added a handmade pocket and some red cardstock and ribbon details.
To make these invitations start by printing our damask template set and trimming it to size.
 I made the folder with some 12 by 12 black cardstock. You can find this kind of paper at any local craft store. I trimmed some red cardstock so that it was just about 1/8" larger on all sides than the invitation, and attached the printed invite to the red cardstock with a glue runner.
I then attached the red cardstock to the pocket folder with a thin black ribbon sandwiched between them and glued in place.
I scored the paper with a bone folder to fold the outer edges inward to envelope the invitation. I tied the rsvp card and enclosure into the inside of the pocket, folded it shut and secured the whole set with a red satin bow.