|
Invitation Template Instructions:
How To Make DIY Party Invitations And More With Our Printable Kits
Need some help or guidance when it comes to creating the stationery pieces included in your invitation template kit? I want to show you some of the easiest ways you can create fabulous DIY invitations, stationery, and party favors and decor, simply by printing our templates from your home computer.
Wedding Invitation Kits
wedding invitations, rsvp, enclosure, etc., place cards, table numbers, favor tags,
wine and water labels, thank you cards
Birthday Invitation Kits
invitations and liners, cupcake toppers, pinwheels, bunting flags
To view and change your instant invitation download:
- 1. Open the PDF file and make sure and save it to your computer. Either save it to the desktop or create a special folder for it.
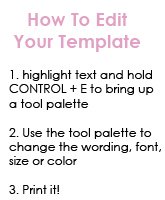
- 2. Highlight the text that you wish to change.
- 3. Press and hold CONTROL and E at the same time. This will bring up a text tool palette.
- 4. Change the wording, font, size and/or color of the text.
- 5. Print it! For best results print at highest quality settings for your printer.
- 6. Trim around the edges to colored border or cut mark guides and cut in half to create two invitations. Invitations without cut marks or Thank You cards need only be cut in half.
- 7. (optional) Back each invitation with card stock and add some ribbon, a bow, or some charms.
Disclaimer: Graphics within the templates cannot be pulled, copied, or ripped from the templates in any way. The templates are meant to be used "as-is" with your own personalized wording, fonts, and font colors. If you need other customizations let us know and we will try to accommodate your needs.
Please do try out the sample copies before purchasing as there are no refunds on downloads.
Recommended Tips And Techniques:
Print onto heavy white cardstock for the best results. I like 110 lb. cover stock
I always recommend printing at your printer's highest quality settings. The image quality is drastically clearer at quality settings
Make sure your printer is not "fit to scale" in the print properties menu. Check "none" in the scaling section.
Use a paper trimmer (and paper punch where applicable) in lieu of scissors. Your invites will look much more polished.
Print and Make Your Own Invitations (And Other Stuff)
Make Your Own Wedding Invitations
Most all of our printable invitations can be printed onto some heavy white cardstock, trimmed with a paper cutter, and then simply used "as is".
Many of our clients like to bring their invites to the next level. I want to show how you can use our templates to create a posh wedding invitation that noone will suspect you actually made yourself.
Some like to simply back the printed invitation with some coordinating colored cardstock, and use a ribbon or belly band to hold the pieces together. Some use a gatefold, petal fold/pochette, or even DIY blank Pocketfolds!
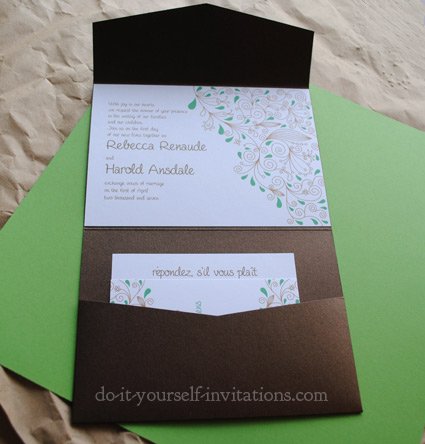
DIY Pocketfold Invitations
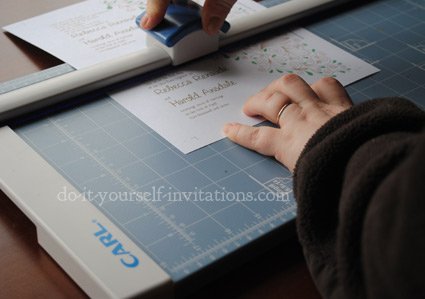
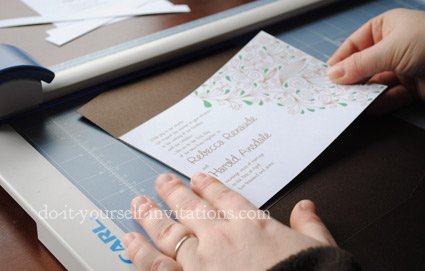
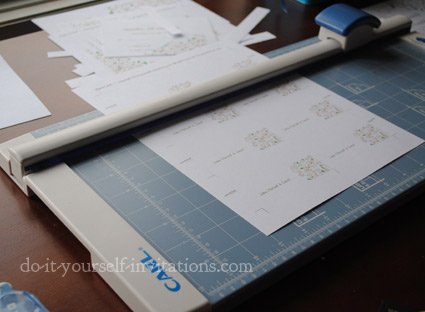
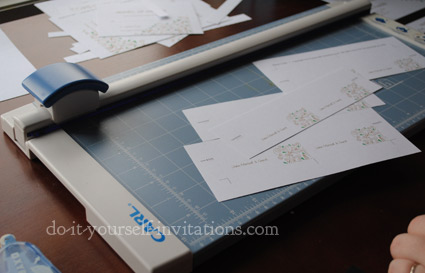
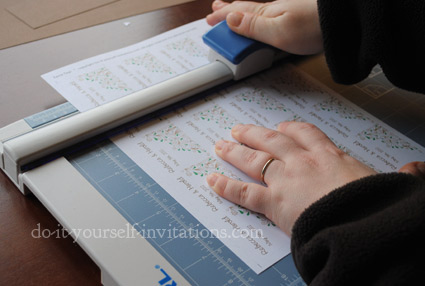
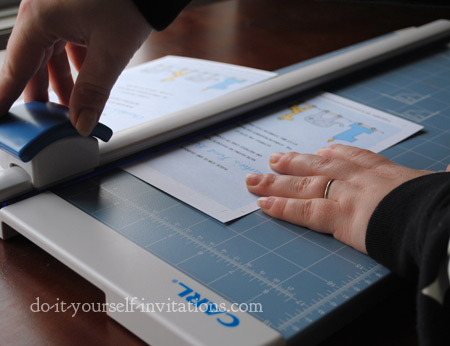
Start by printing your template onto some heavy white cardstock. Use a good paper cutter to trim the invitations to size. Included on all templates are cutting guides to help you line up where to cut. Most all paper cutters have a grid on them as well. Use the grid to ensure the sizing and to make sure you are keeping your paper perfectly aligned for straight cutting. This makes a world of difference!
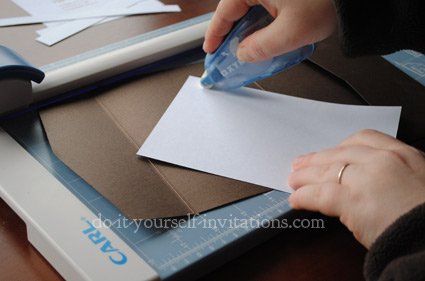
Apply some adhesive to the back of your invitation using a good glue stick, or my personal favorite, and adhesive/glue runner. I LOVE my glue runner! BUT, the glue can run out fast and get expensive. The trick is to use a few well placed strips of glue. Use it sparingly and it will go a long way. I usually dab a small strip on each edge and in the middle.
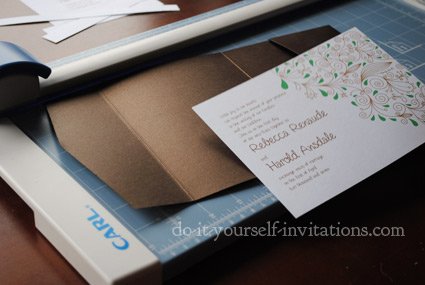
Line the invitation up with an edge of the pocket folder and attach it in place. Center it best as you can.
To complete the rest of the pieces trim them using the same manor and simply arrange them within the pocket.
Some good pieces to include are the response card and reception card. I like to use the enclosure template to print out directions and hotel accomodations as well. You can also create a small menu card or include the menu card included in the template kit.
Some Useful Hints And Tips:
One way to add texture and richness to your pocket pieces (rsvp, enclosure, etc) is to add their own colored cardstock backing. Cut the cardstock just slightly larger than the piece (by 1/4" or so) and then layer them together with some glue.
Another really nice touch is to layer a decorative patterned paper between your invitation and cradstock, or between the pocketfolder. Cut the pattern paper slightly larger than the invitation, but slightly smaller then the cardstock backing or pocketfold.
Want to give your paper rounded corners? There are corner rounder punches you can buy at most any craft store or office supply.
You do not have to stop at adding colored paper! Try using stick on rhinestones, pearls, accent ink and glitter glue, paper distressing, and more!
DIY Place Cards
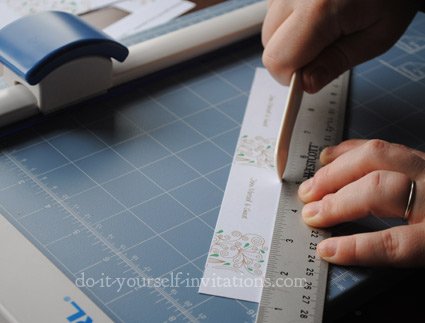
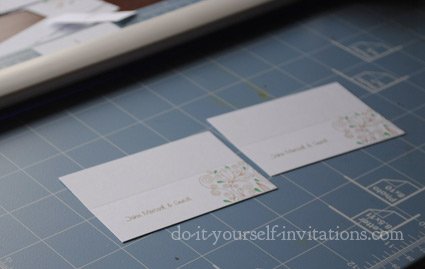
Print the place card template onto heavy white cardstock. Start trimming the cards fromt the paper, BUT start by cutting the paper horizontally and NOT vertically. DO NOT trim the end pieces off until after your have scored the cards.
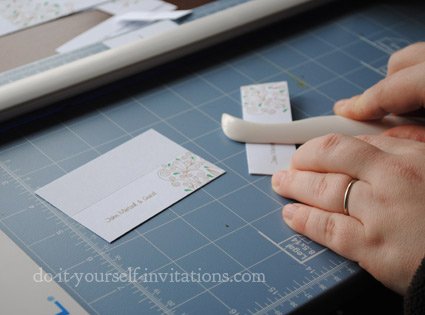
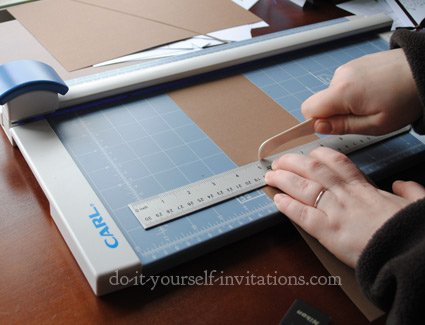
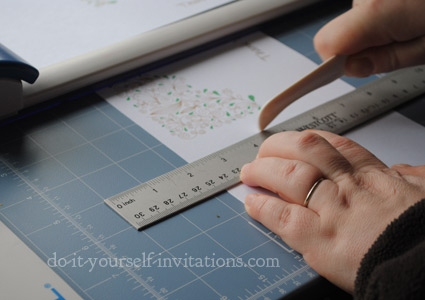
After trimming the paper horizontally, hold a ruler across where the marks indicate "score and fold". Use a bone folder, or anything similar you can find (I have even used a chop stick before) to score across the middle of the cards against the ruler.
Trim the pieces in half by using your paper cutters measurment guides to cut them at 4 1/4" inches.
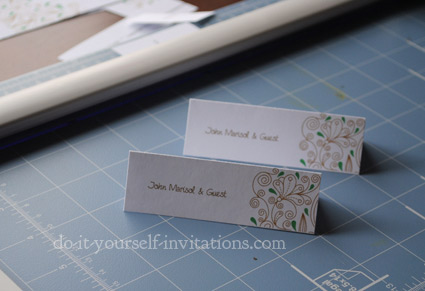
Fold the cards in half and use your bone folder (or even your ruler) to smooth over the fold. Viola!
Make Your Own Table Numbers
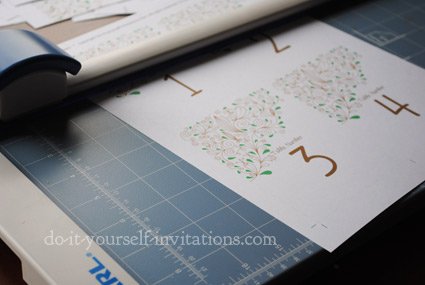
There are several ways to create fantastic DIY table numbers. I have created these to print four to a page. You can trim them out and use them in any manner you see fit.
I have seen people insert them into a special table number holder. They have been framed and propped on tables, and some more, creative uses as well.
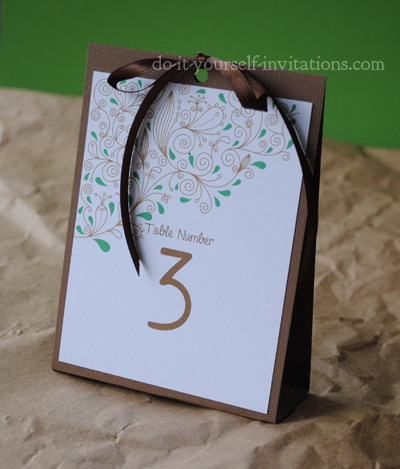
Here is one creative DIY way to make your own standing table numbers:
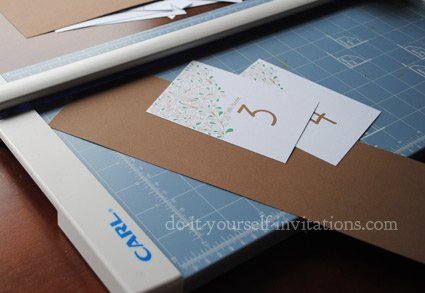
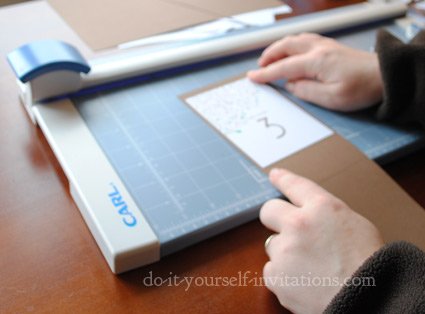
Start by printing your table numbers onto an appropriate paper (I recommend using cardstock - how thick depends on how you choose to display your table numbers). Trim the pieces from the paper. One sheet will print four table numbers.
Next Cut some 12 x 12 cardstock into strips measuring 4" wide and 12" long.
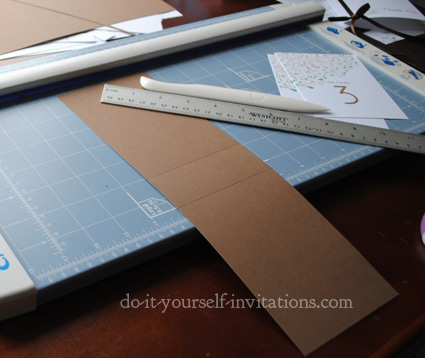
Measure in 5 1/4" from both ends of the paper and make a score mark across the paper horizontally.
Apply some adhesive to the back of the table number using a glue stick or glue runner. Attach the table number to the cradstock lining it up about 1/8" from the scoring mark and the edges of the paper.
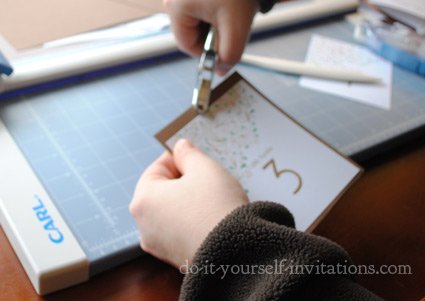
Fold the cardstock across the scoring marks. Next get out a circular paper punch and punch a hole into the cardstock, directly in the middle of the paper, through both the front and back part of the folded cardstock.
Thread some ribbon or raffia through the holes and tie into a bow or knot. Now you can stand the cardstock up to place onto a table!
DIY Wedding Favor Tags
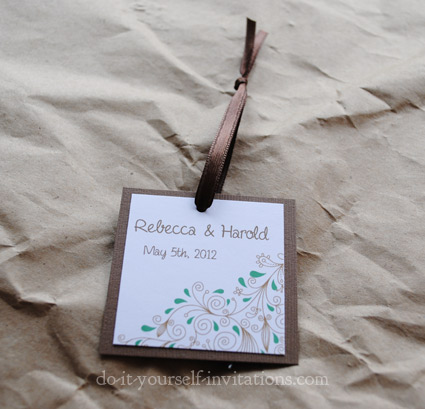
The DIY wedding favor tag template can easily be used "as-is" by simply cutting, trimming, and punching a hole for placeing a string. BUT there is several other ways to dress them up, as well! And other uses, too.
Use them as a favor tag, or create envelope seals to place on the back of your sealed envelopes. You can use them to tie around the bottom of wine glasses or champagne flutes. Or you can even use them as place card/table number indicators by creatively hanging them.
Creating DIY Favor Tags:
Print, trim, and use "as-is"
Use a large circular paper punch to make round tags
Add cardstock or decorative paper backing
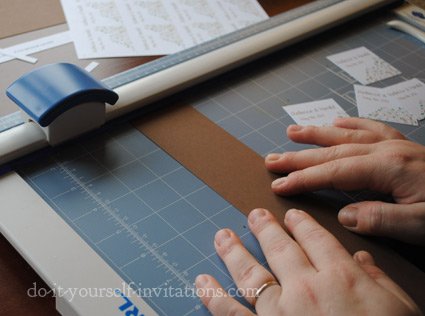
Start by printing out the DIY wedding favor tag template onto thick white cardstock. I recommend using 110 lb. cover stock. Trim the tags out from the paper using a paper trimmer and out handy cutting guidlines. The template creates several 2" by 2" favor tags.
Cut some colored cardstock into 2 1/4" by 2 1/4" pieces.
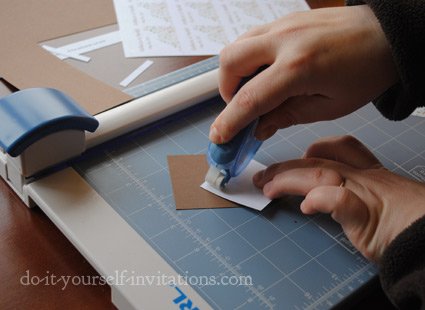
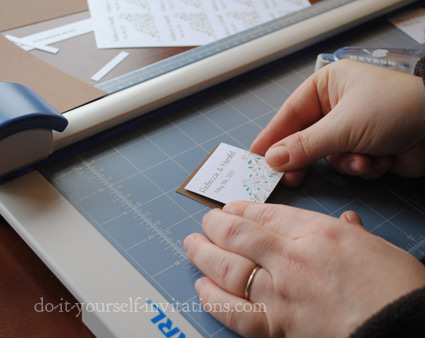
Apply some adhesive to the back of the tags and attach them centered onto the cut cardstock pieces.
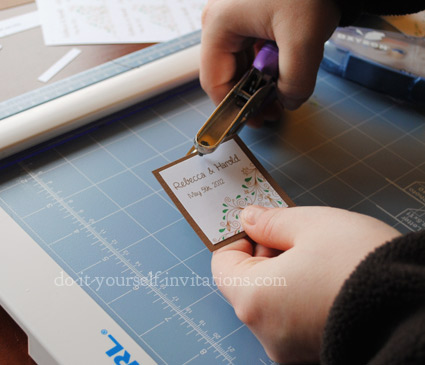
Punch a small hole into the center top or corner of the favor tag. I like to use an 1/8" circle punch. You can find this size punch at any crafts store, or even the craft section in department stores like Walmart and Target.
Thread a ribbon, raffia, or some bakers twine or string, through the punched hole. The result is a fab DIY favor tag!
Printable Water and Wine bottle Labels
The wine and water bottle label templates are designed to simply print, trim, and attach to a bottle. Pretty straight forward. Of course, adding a larger decorative paper wrap to the bottle ahead of time wouldn't hurt for decorations sake, but is not necessary.
I whole heartedly recommend using 110 lb. cardstock to print onto, and attach the labels using some super stong adhesive. I have used permanent adhesive glue runner, but I think for real durability a glue gun would work best.
Keep in mind, the water bottle labels are designed for the small skinny water bottles. They can be used for larger sizes if you apply a larger decorative or colored cardstock label first, then layer the printable label over the first.
Make Your Own Thank You Cards
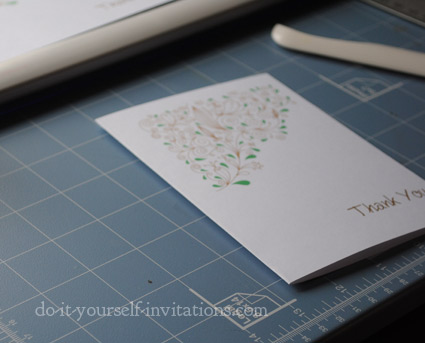
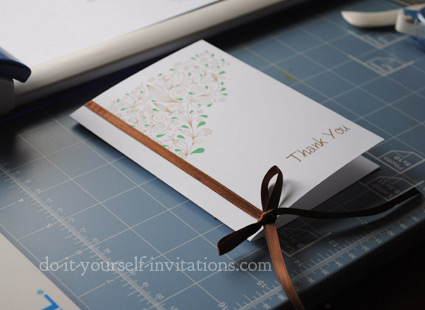
To print and create thank you cards using our templates, start by printing the template out onto heavy paper and cutting the paper in half.
Many of the Thank You templates are designed to attach a ribbon, but if you want your graphics flush to the fold and edges of the card you may want to trim the paper further before folding it.
After cutting the paper in half, make a score mark for folding right at the middle point of the paper (4 1/4"). Fold the paper in half to create a folded card.
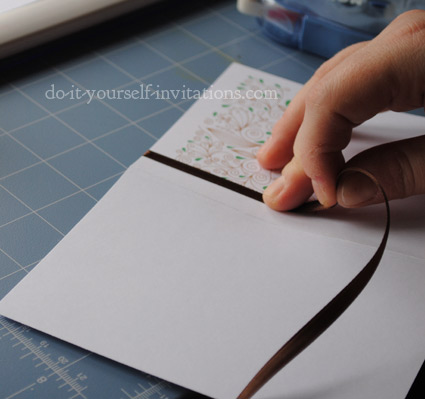
Apply some glue or adhesive runner to the back of a ribbon and attach it to the front of the card. The ribbon should run down the front of the card as well as into the inside fold of the card.
Tie the ribbon into a bow at the bottom of the card and then trim the ends at an angle to give a finished look.
Creating DIY Party Invitations Kits, Favors, And More
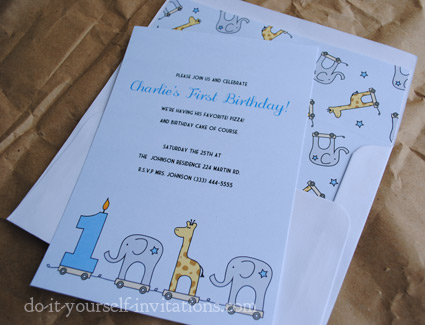
After personalizing the wording and text on your template, print the invitation kit onto heavy white cradstock. I recommend using 110 lb. or 90 lb. cover stock.
Trim all pieces using a paper trimmer. You can also use scissors but you will have a much more polished invitation set using a sliding blade trimmer. You can get a decent one for around $20 at any craft store or office supply.
All of our invitations are designed to print, trim, and use "as-is". But you do not have to stop there! You can take it to the next level by adding a cardstock backing in a coordinating color, or adding some ribbon, charms, glitter, and more. Let you're creativity run wild!
Creating Envelope Liners
Trim the liner sheet after printing. The liner sheet is provided as a simple patterned piece of paper, as there are many different styles of envelopes.
To create a liner start by measuring the dimensions of your open envelope. Cut the liner into the correct size to fit within your envelope, ending just below where the glue is on the envelope.
Hold the liner over the envelope and mark where the fold should go. Score the liner across in the correct spot to line up with the envelope fold.
If the envelope you choose are squared a7 (booklet) envelopes then your liner can be inserted straight into the envelope. But many have a slight angle to the up flap.
To determine the anlge on the flap I measure how far from the edge the end of the flap reaches. Measure the same distance onto your liner. Use your paper trimmer to trim from the measure mark to where you scored your paper.
Apply some adhesive to the backside of the top flap of the liner. Fit the liner into the envelope and then press the flap into place.
Another pretty effective way to create an envelope liner, is to cut apart one of your envelopes. Rin the envelope open, and trim off the excess paper until you are left with what your liner would be shaped as. Use this piece as a pattern and lay it over the back of your liner. Trace the shape and the trim the paper using your tracing as a guideline.
Cupcake Toppers
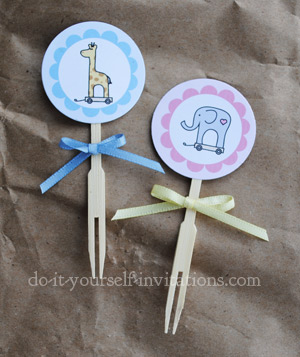 All of our printable cupcake toppers include a cutting guideline, although cutting by hand (with scissors) is not entirely recommended. Each topper is exctly 2" circumference. The absolute easiest way to cut the toppers from the paper is to use a large circular paper punch. All of our printable cupcake toppers include a cutting guideline, although cutting by hand (with scissors) is not entirely recommended. Each topper is exctly 2" circumference. The absolute easiest way to cut the toppers from the paper is to use a large circular paper punch.
When I create these by cutting the paper into sections to reduce the size of the white paper around each topper, and then punch them out by hand with a 2" paper punch.
Next I use some quick dry adhesive (My fave is Scotch brand) to sandwich a flat tooth pick or lollipop stick between two toppers. After they are dried I like to tie on little bows for an added decoration.
DIY Pinwheels
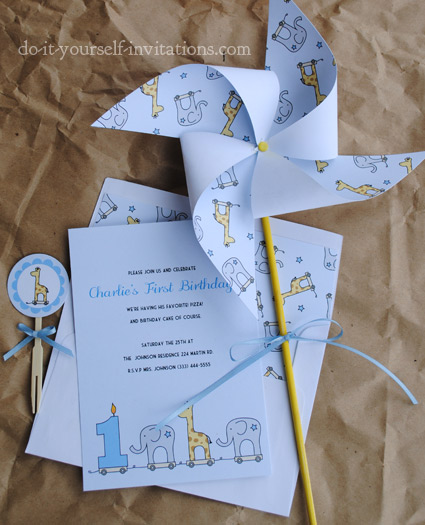
These pinwheels make an excellent decoration, party favor, or you can even add them to a table centerpiece decoration.
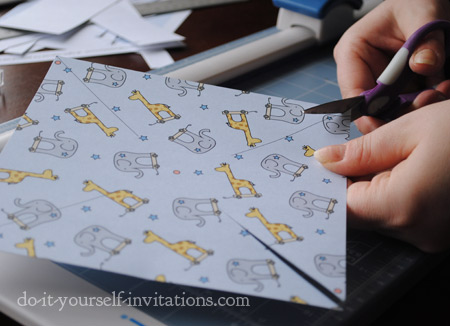
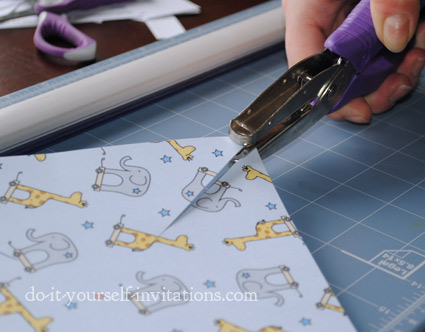
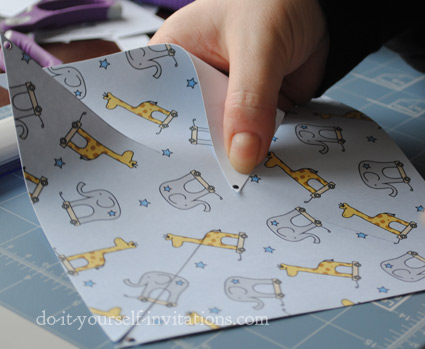
Start by trimming the pinwheel template from the paper. Cut a slit on each of the guidelines using a pair of scissors. Punch a small hole at each of the places indicated on the template (shows a small punch hole mark). I use a 1/8" sized paper punch, but you can punch the holes any way you want.
You can make the pinwheels strictly as decoration,. OR make them real working pinwheels!
1. As decoration(easy) - to create DIY pinwheel decorations it is easiets to use a brad inserted through each punched hole and then through the middle of the paper. Carefully fold each petal inward to line up the holes over the center mark. I insert the brad into each punched hole a I am folding inward. fold open the brad on the opposite, back side of the pinwheel.
2. Create a real working pinwheel - if you are willing to put in a little bit of extra work you can create pinwheels that really do spin with the breeze! The trick? Use an eyelet and punch to hold together the petals to the center point. You will need an eyelet setter kit or a cropodile punch.
Follow the directions that come with your eyelet setter to affix the eyelet through the papers holding everything together. Then insert a brad throught the middle and attch it to a wooden dowel.
DIY Printable Bunting Decorations
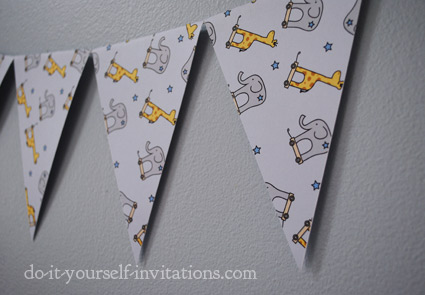
Such a cute and classic decoration to add to any party. To make these party buntings print the bunting template out several times on a paper of your choice. For a sturdier decorative bunting, use cardstock. 65 lb. cardstock should work just fine.
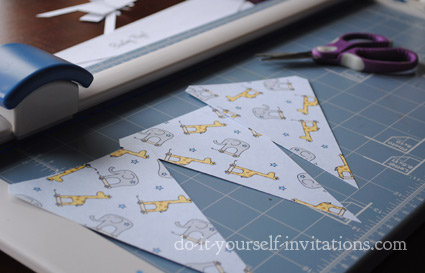
Trim the flags from the page and then score (optional) and fold across the dotted lines at the top of the flag.
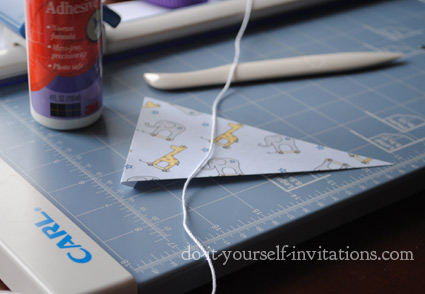
Use some craft glue and tape to attach the flags along a string or ribbon. After they are dry hang them everywhere and anywhere as a birthday party decoration.
|

 All of our printable cupcake toppers include a cutting guideline, although cutting by hand (with scissors) is not entirely recommended. Each topper is exctly 2" circumference. The absolute easiest way to cut the toppers from the paper is to use a large circular paper punch.