|
|
|||
|
Make Your Own Photo Wedding Thank You Cards
Photo wedding thank you cards are a perfectly unique and personalized way to send a big "Thanks" to your wedding guests. Show them you really care by lending your own personal touch. Make the thank you cards yourself! Create thank you cards that are crafty and handmade by putting together scrapbook style cards, or use a photo editor or digital scrapbooking to design your own printed glossy photo thank you worthy of a frame. You can make your own wedding thank you cards that are simple to make as well as affordable. I want to share a couple of my DIY ideas for photo wedding thank you cards.
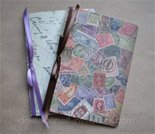
Make Handmade Scrapbook Photo Wedding Thank You Cards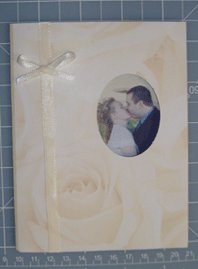
Photo Wedding Thank You Cards Supplies:
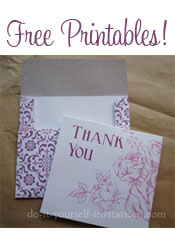
To create small folded cards all you have to do is cut a sheet of the cardstock in half, score it across the middle, and fold it in half. Viola! A handmade folded card! Would you like a printed card? Say, with the "thank you" printed within the inside of the card? No problem! We have free printable templates to help you do just that! Simply type in the wording and then follow the instructions above. :-)
Use some glue (my favorite is glue runner adhesive) to affix the paper to the front of the card. Use a heavy duty large paper punch to punch a hole into the upper right hand side of the card (or wherever else on the card floats your boat). I used an oval paper punch, but you could use any shape you want. From circles and squares, to decorative shapes like leaves and scallop circles! Get as creative as you please!
Use some glue or photo corners to attach the photo to the inside of the card. Make sure the photo is arranged so that when you shut the card the photo shows through!
After attaching the ribbon snip the edges that over hang the edges of the card. Tie a little bow using the same ribbon and glue that right over the ribbon attached to the card.
Tips To Make Photo Wedding Thank You Cards:
I took a much larger picture and cropped it down and took out most of the background "noise" so that the picture only shows my husband and I having our first kiss as Man and Wife. I then set it up to print several times to one page. I cut them out individually to attach to each card.
Design Your Own Printable Photo Wedding Thank You CardsDesigning your own photo wedding thank you cards can be easy and you don't necessarily need special software to do it. I want to share with you some of my top free online resources, as well as free downloadable software and creative photo taking tips.
A Simple Photo Thank You. If you've got a photo editor installed on your computer than this is simple! Just open the photo and type away. Have the pictures processed (or print them yourself) write something personal on the back and send away! But there are also many other free photo editing resources available and ripe for the picking! Here is just a few to choose from. Happy downloading!
Free Online Photo Editing Tools:
But why not get creative? If you know ahead of time that you will make your own thank you cards, you may want to keep a few shots in mind for your wedding photographer to indulge in.
There are tons of online websites you can visit to put together a small printable digital scrapbooking pages. Many are sites in which you must buy the graphics and online "papers" and "stickers". But there are a few that I know of that are free to join!
These websites are awesome! You can upload your own photos and even graphics. They have lots of themes to choose from and each pack comes with it's own background patterns, "stickers" and other digital embellishments. You can get really creative and when you're all done they allow you to save as a Jpeg file and print it. You even have the option to upload to an online printer and have your project printed for you!
|
The DIYI Ezine
Stay up to date with the newest tutorials, free printables and giveaways!
|
|||
|
|
||||
|
| Homepage | Shop | Wedding Invitations | Birthday Invitations | Baby Shower Invitations | Printable Invitations | Bridal Shower | Blog | Contact | Advertising Policy | Privacy Policy
By Chris Fleckenstein, Copyright © 2006-2013 Do-it-yourself-invitations.com |
||||
 Choose a photo form the wedding, or you could even choose a different photo for each card featuring the guests you are sending the card to. A lot of work I know, but a very thoughtful gesture!
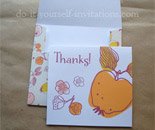
 Creating your simple photo wedding thank you card does not have to be super complicated. A photo with a simple "Thank You" will suffice.