
|
|
|||
|
Make Your Own New Years Eve InvitationsWhen I was thinking of themes for these new years eve invitations the one image that kept coming to mind over and over was the ball dropping at central square. What a simple and elegant theme for an invitation. This invitation can be paired with a casual family and friends party, to a ritzy new years eve gala. I used simple die cut and paper punched pieces coated in glitter and gloss medium to accent this invite.
 Supplies used to make New Years Eve Invitations:
I started by making my own cards using 110 lb. cardstock. I created a template with the small dots you see at the top of the invite (kind of "suspending" the ball from the top of the card) which is free to download for your personal use. If you want to print some wording onto the inside of the card I also have free downloadable templates for that here on the printable invitations templates page.
How I created the decorative Accents on the front of the invite:
I used some good craft glue to attach the decorative pieces to the front of the invitations and that was it! My absolute fave glue to use for this kind of project is Scotch Quick Dry Adhesive with the precision tip. You have to work quick with it but it has really great hold and is very light.
Simple Shortcuts To Making These New Years Eve InvitationsI created the numbers for the front of the invitations using a Cricut Die cutting machine, but realize that not everyone has this kind of machine readily available. Soooo, I wanted to share some other ways to get the same look using other tools and supplies. Some are even easier than what is already outlined above!Paper punches - Yes there are number and letter paper punch sets out there. Simply punch the numerals out of a coordinating colored cardstock. Other Die Cutting systems - There are less involved and more affordable die cutting systems such as the Cuttlebug, Sizzix, or spellbinders. You can buy a hand cranked machine and die cut plates to use in conjunction. Die Cut Paper - sometimes you can buy pre-cut shapes and decorate the yourself. If you can come across these they are a time saver for sure. Stickers - these days there are a TON of different kinds of stickers out there, mainly used for scrapbook and cardmaking. At most any craft store there will be entire aisles dedicate to stickers. Good Olaf glitter and glue - you can always simple write the new years date using craft glue and shake some glitter onto it. tap off the excess and viola! Pre-printed date - I also have provided a customizeable template with a spot to enter the date/year in case you want to go the easiest route possible!
|
The DIYI Ezine
Stay up to date with the newest tutorials, free printables and giveaways!
|
|||
|
|
||||
|
| Homepage | Shop | Wedding Invitations | Birthday Invitations | Baby Shower Invitations | Printable Invitations | Bridal Shower | Blog | Contact | Advertising Policy | Privacy Policy
By Chris Fleckenstein, Copyright © 2006-2013 Do-it-yourself-invitations.com |
||||
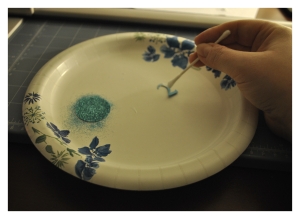 Once the cards were created all I had to do was add the decorative accents to the front of the card and they will be finished. I used a 1 1/4" round paper punch to create the "ball". I punched the circle out of bright blue cardstock. To create the numbers to place the "new year" onto the front of these New Years Eve Invitations, I used my


