
|
|
|||
|
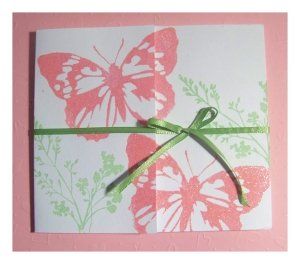
DIY Butterfly Baby Shower InvitationsLooking for a bit of a different kind of invitation? These elegant and modern baby shower invitations are sure to stand out! I wanted to stray away from the usual cutesy bubbles and diapers and baby bottles, and show that you can create baby shower invitations that are a bit more modern and whimsical yet still have a feel for the child-like. I put these together with somewhat sophisticated images but with bright colors you may find in a little girl's bedroom. They turned out quite beautiful if I do say so myself. ;-)These invitations really wren't too hard to put together. They will be a perfect idea for anyone looking to create some butterfly baby shower invitations. To create the butterfly images I used clear rubber stamps, some colored ink, and a little irridescent embossing powder.
To create the butterfly and plant images I used clear stamps. Clear stamps are rubber stamps which come as a set which are unmounted. To use them you must also have a clear stamp block which you will affix them to when stamping. These stamps are awesome! I will never go back to using a regular wooden mounted stamp again (unless the image is particularly unique fo course). When using clear stamps it is so much easier to see where you are stamping s there are far fewer mess ups. After you are done you can peel the stamp off of the block and put them right back in their package for the next use. Very cool!!
I decided to emboss the butterflies so I made sure and stamped them quickly one after the other. After both were stamped onto the card I quickly dusted them with some embossing
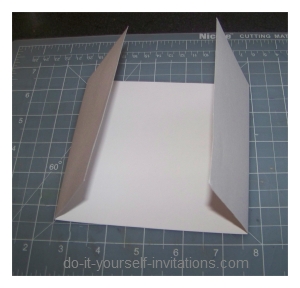
Next I changed my rubber stamp to that of a wild flower plant image. I changed ink colors as well, switching from bright pink to green. I stamped the plant image around the outer sides of To add the wording to the card I cut out some 5 1/2" byu 5 1/2" squares of decorative paper with a coordinating pattern. I attached the paper to the inside of the modern baby shower invitations using an adhesive runner with permanent glue. I then printed the wording for the invitation on plain white 24 lb. paper and cut this into 5" by 5" squares. I glued these down to the inside of the invitations centering it inside of the decorative paper. To finis the invitation I simply tied the ribbon into a bow on the front of the invitation and trimmed the ends of the ribbon at an angle, and so they both hung equally. That's it! Relatively simple to put together unique and modern baby shower invitations.
See Also
silly and funky baby gift thank you card Have you recently made your own invitations?Want to share them with us?Have your handmade invitations featured on our Do It Yourself Invitations! Just visit our Reader Submissions Page and tell us about your handy work!
|

The DIYI Ezine
Stay up to date with the newest tutorials, free printables and giveaways!
|
|||
|
|
||||
|
| Homepage | Shop | Wedding Invitations | Birthday Invitations | Baby Shower Invitations | Printable Invitations | Bridal Shower | Blog | Contact | Advertising Policy | Privacy Policy
By Chris Fleckenstein, Copyright © 2006-2013 Do-it-yourself-invitations.com |
||||
 Materials used to create these butterfly baby shower invitations:
 overlapped by about 1/8" - 1/4".
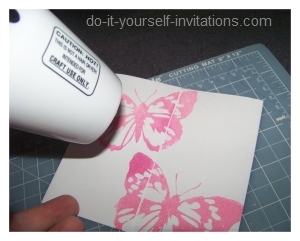 powder covering them thoroughly. I used a clear irridescent powder. You could also stamp the butterflies in clear embossing ink and then apply colored embossing powder. I like to use colored ink so I can see my image clearly to know if I screwed up when stamping.
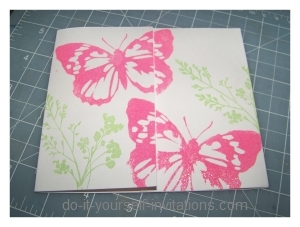 the card around the butterflies. I decided not to emboss the plants. I like the different textures of the images on the crads. It makes the plnts seem more in the background as well.


