|
|
|||
First Birthday InvitationsCreative Ideas for Making Photo First Birthday Invitations
Your baby's first birthday is such a huge milestone and an event to remember! But let's face it, your soon to be one year old has no idea what is going on. He could care less what his party's theme will be, or how many guests arrive. Whatever efforts you put into teh party will be for YOU and your memories. I say "go all out!" and make it a day to remember forever. At least you will have some great photos and mementos to remember it by. And these handmade birthday invitations will be forever immortalized within the pages of your scrapbooks!
Making First Birthday Invitation With Photos Photo invitations are hugely popular amongst the Mom crowds. Who can blame them? It's the perfect excuse for showing off that perfect little face! BUt what if you are in a time crunch, don't want to spend much money, or you just want something special? I wanted to show how you can make cute photo birthday invitations right from your own computer and printer. Photo invitations are hugely popular amongst the Mom crowds. Who can blame them? It's the perfect excuse for showing off that perfect little face! BUt what if you are in a time crunch, don't want to spend much money, or you just want something special? I wanted to show how you can make cute photo birthday invitations right from your own computer and printer.There are a bunch of great and inexpensive/easy ways to get photo invitations made. But first I want to show you how I created these particular photo invites.
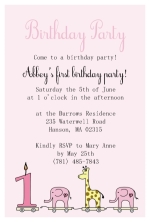
Next I used my favorite desktop publishing program to set up the picture to print 2 times on the far right hand side of my paper. I printed this onto heavy weight 110Lb. white cardstock using my printer's highest quality photo settings. After printing the next step to take is to cut the paper in half. I used a personal paper trimmer. If you are making a huge quantity of invitations you may want to have them cut for you at a copy or print shop. I first cut the paper in half width wise. Most printers do not print directly to the edge of the paper when printing in this manner, so you may also want to trim to the printed edge, as I did.


Next I cut out two small paper rectangles using white and green cardstock. I used an extra large tag punch to create the rectangles. Next I punched the word "party" onto the white rectangle using a clear stamp and some blue stamping ink. I attached the rectangles together with a glue runner. I attached the rectangles to the bottom center of the card by dabbing some glue runner adhesive to the backs. I also applied the same adhesive to the large number "1" and attached it to the front at a slight angle. For the finishing touch, which I found a bit shabby but in a sort of good way, was to simply cut out one of teh dinosaurs from some scrap s of the decorative dinosaur paper. I cut it out using a craft knife, applied some quick dry glue to the back and then attached it to the front of the card. In the future I might have bought some matching stickers or something similar to add this last embellishment. But sometimes you just gotta work with what you've got!
|
You Might Like...


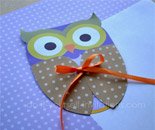 Printable Owl Invites
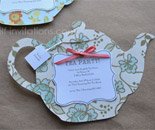 DIY Tea Party Invitations
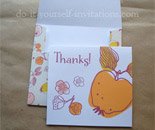 Printable Thank You Cards
The DIYI Ezine
Stay up to date with the newest tutorials, free printables and giveaways!
 |
|||
|
|
||||
|
| Homepage | Shop | Wedding Invitations | Birthday Invitations | Baby Shower Invitations | Printable Invitations | Bridal Shower | Blog | Contact | Advertising Policy | Privacy Policy
By Chris Fleckenstein, Copyright © 2006-2013 Do-it-yourself-invitations.com |
||||