
|
|
|||||
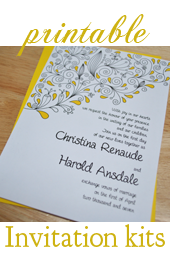
Fall Wedding Invitations
This fall wedding invitations tutorial is for a pretty simple invitation project. The theme lies solely in the colors and patterned paper. We binded the invitation with some raffia to help go along with the fall theme. You could also use some coordinating ribbon instead. |
||||||

- 8 1/2" by 11" card stock
- 8 1/2" by 11" translucent or frosted vellum
- 12" by 12" themed autums/fall decorative paper
- raffia or ribbon
- glue runner
Start by printing the wording for your invitations onto the 8 1/2 by 11" vellum. The best way to go about this would be to either print the wording 2-up (to to a page) or simply cut the paper in half before printing and print onto it.
The vellum should be cut in half and then trimmed down by 1/4" on all sides, so that the vellum paper measures 5" by 8".
Cut the card stock for the base of the invitation in half. You should end up with two pieces of cardstock measuring 5 1/2" by 8 1/2" each.
Also cut the decorative 12" by 12" paper into strips measuring 12" by 2". You may also want to get your raffia or ribbon ready by cutting it into 14" lengths.
To assemble the invitation start by applying a strip of glue to the back of the vellum, just across the top of the paper. Affix this piece to the card stock backing by centering it to the card and applying some pressure at the top.
Lay a strip of decorative paper face down on your work surface and lay the invitation on top of it, also face down. Wrap the edges of the decorative paper around the invitation, folding it at the sides, and affix into place with a strip of glue.
Turn the invitation over and tie a piece or two of raffia around it. Viola! Beautiful handmade fall wedding invitations!
* Enlist the help of a local copy or print shop for cutting your papers or even printing the wording into the vellum. It will take a lot of stress out of the process, make it much quicker and easier.
* For a nice rustic kind of look try using handmade paper layered under translucent vellum. You can even use a faux handmade paper that you can print right onto.
* decorative paper - KI Memories "Grateful Tree Farm"
* Cardstock - Bazzill Basics Bling Cardstock in color "Handsome"
* Xyron permanent glue runner
You may also like our rustic handmade paper fall wedding invitations idea...
Do It Yourself Invitations Homepage > Make Your Own Wedding Invitations > Fall Wedding Invitations
The DIYI Ezine


Printable Invitations | Bridal Shower | Blog | Contact | Advertising Policy | Privacy Policy
By Chris Fleckenstein, Copyright © 2006-2013 Do-it-yourself-invitations.com