|
|
|||||
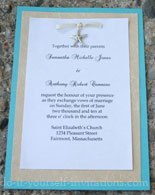
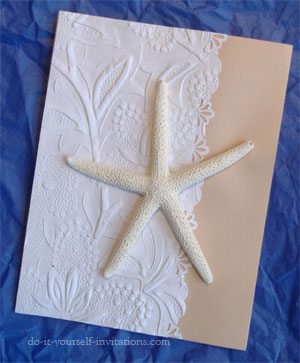
DIY Beach Wedding InvitationsUnique Beach Wedding Invitations With Real Starfish
You can buy these starfish at most any craft store and online, in many different sizes. The larger they are the more heavy they tend to be, so you will need to experiment a bit with different weight papers against different sizes of star fish until you have just the right ratio. Selecting the right glue is paramount! You need a combination of glues actually. One for holding your paper layers together, and one for getting that starfish to hold onto the front without warping the paper. And for those of you who are a bit squeamish about using actual, real starfish, I have another solution! DIY paper clay starfish! You'll have to make them yourself, but they are light as a feather and will not mean the potential harm to any sea creatures. :-)
SO, to print the wording for the inside of the invitation, the wording would need to be printed onto a 4.25 by 5.5 piece of paper. There's a couple ways to go about doing this. 1. you could cut some paper into quarters and then print straight onto them with your computer printer. 2. Print the wording four times to a single sheet of paper and then cut it into quarters. I even happen to have a free invitation template available that will help you easily do just that!
BUT, if you would just as soon save a bit of money, or you want to use a very particular color and texture of paper, then making cards the DIY way is the way to go. I chose a standard 8.5 by 11 inch sheet of paper. But remember, if you are making them yourself you can make them any size you like. I am also very fond of using 12 by 12 inch paper to make 6 by 6 cards, which I happen to think very chic for a wedding invitations. To create your folded card is simple. Start by cutting the cardstock in half. Score the half sheets of paper across the middle where you intend to fold the paper. Fold the paper across the score. Viola!
If you are cutting them yourself? Well it's a bit tedious but saves money, that's for sure! Lol! To get down to business - You want to cut the decorative paper to fit over about 2/3's of the page. In other words, whatever the size of the front of the card - minus a couple of inches in width. You can certainly use the paper as is and attach it to the card. But I went a step further and added a decorative border to the right hand side edge of the paper. To apply the decorative edge I simply used a lacy border punch. Anything lacy or scallop edged should work quite well. The best way to attach the paper to the front of the card will depend on the texture of the paper. I'm really font of double sided tape and adhesive runners. Some have reported that a high quality glue stick is a good choice as well. But I find that glue sticks don't work well for the long run. The last thing you want is to find that the invites fell apart in their envelope in the mail! Pick you best glue option and simply attach teh paper to the left side of the card lined up with all three edges.
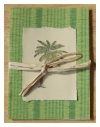
You could add sand dollars, or sea shells, or even some die cut pieces such as seahorses or palm trees. Make it your own! Try to choose a size of starfish that is not too heavy for the thickness of cardstock you have chosen. I made these invites somewhat small to accommodate for the weight of the starfish. You'll need to use a really reliable craft glue to hold this together. A mini glue gun could be used. My absolute fave glue is Scotch's quick dry adhesive. It is light but holds very well and dries fast. Simply glue the starfish (or whichever ornament you choose) to teh front of the card and you're done! You've created gorgeous and unique beach wedding invitations that will "wow" your guests!
Create DIY Fauxe Starfish For Your Beach Wedding InvitationsHere's a cheap and creative way to add "starfish" to the front of your invites! Make them yourself!You can create unique handmade starfish ornaments using super light weight and easy to work with paperclay! It needs no oven to set, only air dries, and it is relatively cheap. If you can get your hands on a starfish soap mold your golden! Simply pop open a package of paperclay and knead the "dough" to make it smooth and pliant. You can even work in some pigment with cream colored paint, or buy some colored clay. If you have a soap mold, then press the clay into the mold and use a butter knife to scrape off any excess. If you have no mold then simply shape them into star shapes. To lend some texture press some course sand paper into the clay. Let the clay dry overnight. By morning you will have super light DIY starfish that will cling effortlessly to the front of your card. Any good craft glue will do!
More ideas and tips to make beach wedding invitations...
|
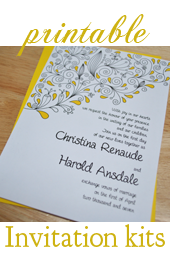
Printables and templates
The DIYI Ezine
Stay up to date with the newest tutorials, free printables and giveaways!
You May Also Like
|
|||||
|
|
||||||
|
| Homepage | Shop | Wedding Invitations | Birthday Invitations | Baby Shower Invitations | Printable Invitations | Bridal Shower | Blog | Contact | Advertising Policy | Privacy Policy
By Chris Fleckenstein, Copyright © 2006-2013 Do-it-yourself-invitations.com |
||||||
 Materials used to make these beach wedding invitations:
 For this particular card I used an 8 1/2" by 11" piece of cardstock to create the folded card. I simply cut the cardstock in half and then folded each half to create a 4.25 by 5.5 inch folded card.